Classroom Plus Plus (CPP) User Guide
Classroom Plus Plus (CPP) is a desktop application designed for educators to manage student and staff contact information, classes, and assignment tracking from a single, centralized place. CPP combines a simple Graphical User Interface (GUI) with a powerful Command-Line Interface (CLI) so teachers can work quickly and reliably.
Who this guide is for
Primary users: Primary and secondary school teachers and tutors who manage classes and student records.
Assumed skills: Basic computer literacy, and comfortable using a CLI. No prior experience with Java or software development is required.
How to use this guide
Use the Quick start section to install and run the app fast.
Use Features to view the full list of features, command reference, and examples.
Refer to the FAQ and Known issues section when troubleshooting.
Refer to the Command summary for a quick reference of all commands and formats.
Use the page navigation at the side to jump between sections.
Table of contents
- Quick start
- Features
- FAQ
- Planned features and future work
- Known issues and workarounds
- Command summary
Quick start
This quick start assumes you are a teacher who wants to install CPP, open the application, and run a few common commands to manage your contacts, classes, and assignments. Follow the short steps below, then consult Features for full command details.
Prerequisites
Minimum disk space:
500 MBfor app + data. Please refer to the section on How to check available disk space to ensure you have enough free space.Java 17 or newer must be installed and available on your PATH (system environment variables). If you are unfamiliar with setting up your PATH or checking your current version, do not worry - just head over to the How to check and install Java section for a quick walkthrough.
If your system meets the above requirements, you may proceed to the section on Install and run to download the application and try out some commands.
How to check available disk space
Windows:
Open File Explorer and navigate to "This PC" or "My Computer".
Look for the drive where you plan to store the app and its data (e.g.,
C:\orD:\).Check the "Free space" column for that drive to ensure it has at least
500MBfree.If you have enough free space, you may proceed to check the Java version as described in the next section How to check and install Java.
macOS:
Click on the Apple menu and select "System Settings".
Go to "General" in the left sidebar.
Click on "Storage".
Check the available space for the drive where you plan to store the app home (e.g., Macintosh HD) to ensure it has at least
500MBfree.If you have enough free space, you may proceed to check the Java version as described in the next section How to check and install Java.
How to check and install Java
Windows:
Open Command Prompt or PowerShell by searching for it in the Windows Search Bar.
To check Java from Command Prompt or PowerShell, run
java -version.If Java is installed, you should see output showing the Java version (e.g.,
java version "17.0.1").Any version that is 17.0.0 or newer is acceptable.Older versions (e.g., Java 8) will not work and must be updated using Step 4.If you see an error like 'java' is not recognized, it means Java is not installed. Please follow Step 4 to install Java.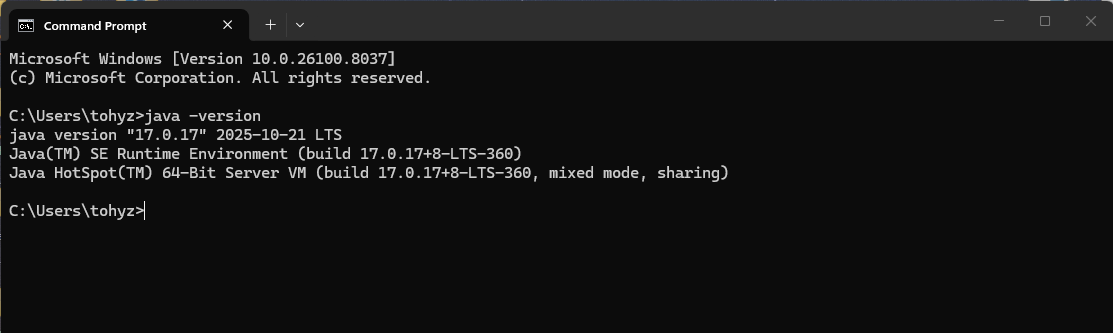
If Java is not found, you may refer to the Windows guide to install Java 17.
Once Java is installed, repeat Steps 1-3 to verify the installation.
macOS:
Open Terminal by pressing
Cmd + Spaceto open Spotlight, then type "Terminal" and press Enter.Run the following command to check your Java version:
java -versionIf Java is installed, you should see output showing the Java version (e.g.,
java version "17").Any version that is 17 or newer is acceptable.Older versions (e.g., Java 8) will not work and must be updated using Step 4.If you see an error like `zsh: command not found: java`, it means Java is not installed. Please follow Step 4 to install Java.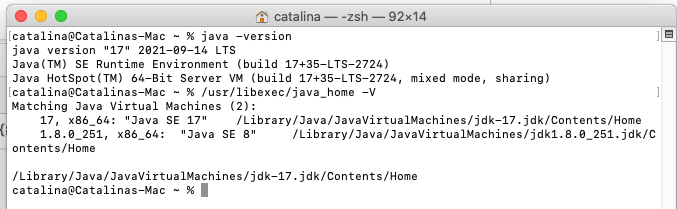
(Source: tutorials24x7)
If Java is not found, you may refer to the macOS guide to install Java 17.
Once Java is installed, repeat Steps 1-3 to verify the installation.
Install and run
Download the latest
cpp.jarfrom the project release page.Move it to a folder that you will use as the app home.
A subfolder "data/" and a file "preferences.json" will both be created in this folder.Users are strongly encouraged to create a dedicated folder for CPP (e.g.,
Documents/CPP) rather than running thecpp.jarfile from a temporary download folder to prevent the accidental deletion of data files.Open the folder where you saved
cpp.jar, right click on an empty space in the folder and select "Open in Terminal" (macOS) or "Open Command Prompt here" (Windows).On later versions of Windows, you may also see "Open in Terminal" which is also fine.To launch the app, type in the following command and press Enter:
java -jar cpp.jar
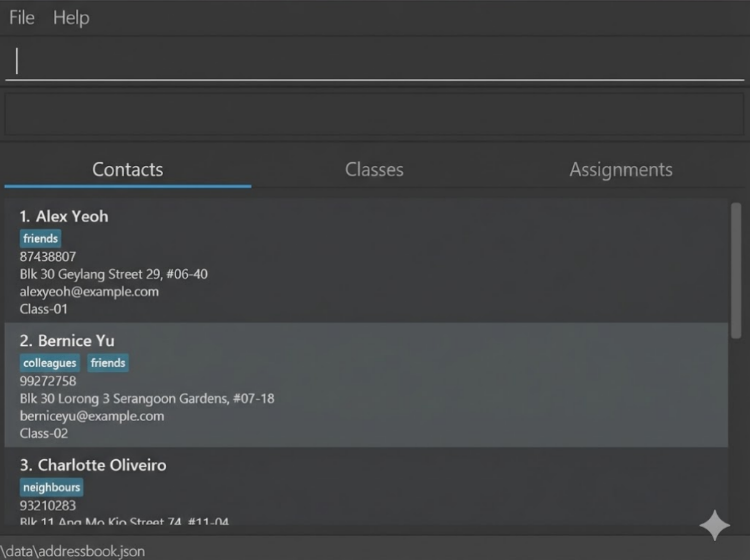
Within a few seconds the application will appear. The main User Interface (UI) contains from top to bottom:
A command box to enter CLI commands.
A result display that shows the output of commands and brief success/error messages.
A central list panel with a toggle to show contacts, classes, or assignments.
The app will automatically load some default contacts on first launch.
Quick CLI tutorial (common tasks and expected output)
In this quick tutorial, we will cover some common tasks such as listing contacts, adding a contact, deleting contacts, and finding contacts by name substring. The expected output shown is based on the default data loaded on first launch. Do paste the commands given in the application's command box and check that the result display and list panel match the expected output given before proceeding to the next command.
Tips:
Do not attempt to copy multiple commands at once. Copy and paste one command at a time, and wait for the result display to show the confirmation message before pasting the next command.
Use
helpin the command box for a quick list of commands:help.If you are unsure of the command format, you may enter the command with incomplete parameters (e.g.,
addcontact n/John Doe) and the app will show an error message with the correct usage.Refer to the Features section for advanced features with the full command format, options and advanced examples.
List all contacts:
Command:
list contactsExpected: Displays a numbered list of contacts in the main panel.
Listed all contactsAdd a contact John Doe with phone, email, address and tags:
Command:
addcontact n/John Doe p/98765432 e/johnd@example.com a/311, Clementi Ave 2 t/TransferStudent FinancialAidExpected: Confirmation message in result display and new contact appears in the list.
New contact added: John Doe; Phone: 98765432; Email: johnd@example.com; Address: 311, Clementi Ave 2; Tags: [TransferStudent][FinancialAid]Delete the 1st, 2nd and 3rd contact in the list:
Command:
delete ct/1 2 3Expected: Confirmation message in result display and contact list updated with the deleted contact removed.
Deleted Contact: Alice Yeoh; Phone: 87438807; Email: alexyeoh@example.com; Address: Blk 30 Geylang Street 29, #06-40; Tags: [friends]
Deleted Contact: Bernice Yu; Phone: 99272758; Email: berniceyu@example.com; Address: Blk 30 Lorong 3 Serangoon Gardens, #07-18; Tags: [colleagues][friends]
Deleted Contact: Charlotte Oliveiro; Phone: 93210283; Email: charlotte@example.com; Address: Blk 11 Ang Mo Kio Street 74, #11-04; Tags: [neighbours]
Find by name substring (case-insensitive):
Command:
findcontact n/dAviD LExpected: Confirmation message in result display and contact list updated to show names containing "david l" (case-insensitive).
1 contact(s) listed!
Warnings:
Back up your data folder (
data/addressbook.json) before manual edits. A corruptedaddressbook.jsonwill cause the app to start with an empty dataset.The app prevents duplicate names within the same category. While an assignment and a class can share the same name, you cannot have two assignments, two classes, or two contacts with identical names. CPP will reject any duplicate entry within a domain with an explanatory error.
Features
Notes about the command format:
Words in
UPPER_CASEare the parameters to be supplied by the user.
e.g. inaddcontact n/CONTACT_NAME,CONTACT_NAMEis a parameter which can be used asaddcontact n/John Doe.Items in square brackets are optional.
e.gn/CONTACT_NAME [t/TAGS...]can be used asn/John Doe t/friend classRepor asn/John Doe.Items with
...after them can be used multiple times.
e.g.[t/TAGS...]can be used ast/friend,t/friend classRepetc.
e.g.ct/CONTACT_INDICES...can be used asct/1,ct/1 2 3,ct/1 3 5 7etc.Parameters can be in any order.
e.g. if the command specifiesn/CONTACT_NAME p/PHONE_NUMBER,p/PHONE_NUMBER n/CONTACT_NAMEis also acceptable.Extraneous parameters for commands that do not take in parameters (such as
help,exit, andclear) will be ignored.
e.g. if the command specifieshelp 123, it will be interpreted ashelp.If you are using a PDF version of this document, be careful when copying and pasting commands that span multiple lines as space characters surrounding line-breaks may be omitted when copied over to the application.
Viewing help : help
Shows a message explaining how to access the help page.

Format: help
Adding a contact: addcontact
Adds a contact to the address book.
Format: addcontact n/CONTACT_NAME p/PHONE_NUMBER e/EMAIL a/ADDRESS [c/CLASS_NAME] [ass/ASSIGNMENT_NAME] [t/TAGS...]
Creates a contact with the specified
CONTACT_NAME,PHONE_NUMBER,EMAILandADDRESS.The
CONTACT_NAMEprovided must contain only alphanumeric characters, spaces,s/oord/opatterns, hyphens-, and parentheses(), subject to the following constraints:CONTACT_NAMEmust start with an alphabetic character.CONTACT_NAMEmust not be blank.Forward slashes
/are only allowed ins/oord/opatterns (case-insensitive), and must follow the pattern[Name] [s/o or d/o] [Name], requiring at least one word before and after the space-delimited separator.s/oandd/opatterns may only appear once inCONTACT_NAMEHyphens
-must be between two alphanumeric characters.Parentheses must:
Not be at the start of the name
Contain only spaces and alphanumeric characters, with at least 1 alphanumeric character
Be properly closed (No nesting allowed)
Open parenthesis
(must be immediately followed by an alphanumeric characterClosing parenthesis
)must be immediately preceded by an alphanumeric character.
Unique contacts will be identified with a combination of their
CONTACT_NAMEandTAGS. If you need to add multiple contacts with the same name, it is recommended to disambiguate them using different tags.Matching for
CONTACT_NAMEwill be space-less and case-insensitive. For example, "Alex Yeoh" will be treated the same as "alexyeoh".The
PHONE_NUMBERprovided must only contain numeric digits (0-9), be a minimum of 3 digits long, and cannot be blank.The
EMAILprovided must be in the formatlocal-part@domain.The local part can contain alphanumeric characters and special characters (
+,.,-), but cannot start or end with special characters.The domain must contain at least one period, each label must be alphanumeric with optional hyphens between characters, and the top-level domain must be at least 2 characters long. No spaces allowed, and cannot be blank.
The
ADDRESSprovided can contain any characters, and cannot be blank.c/CLASS_NAMEis optional and can be used to allocate the specified class to the contact. If thec/prefix is included, theCLASS_NAMEmust match the name of an existing class (space-less and case-insensitive matching).ass/ASSIGNMENT_NAMEis optional and can be used to allocate the specified assignment to the contact. If theass/prefix is included, theASSIGNMENT_NAMEmust match the name of an existing assignment (space-less and case-insensitive matching).t/TAGS...is optional and can be used to add tags to the contact. EachTAGmust be a single alphanumeric word (no spaces). While tags are displayed case-sensitive in the app, they are matched case-insensitively for command inputs (e.g.,t/friendandt/Friendwill be treated as the same tag). Tags must be unique within each contact (case-insensitive), but there are no restrictions on different contacts having the same tag.For multiple tags, use a single
t/prefix followed by space-separated tags (e.g.,t/friends owesMoney). If thet/prefix is included, at least 1 tag must be specified.Repeating the tag prefix (e.g.,
t/friends t/owesMoney) is not accepted.If multiple instances of the same tag are provided, the command still succeeds, but only one instance of that tag is added.
Warnings:
If the specified class or assignment does not exist, the command will fail and no contact is created.
If any of the parameters are invalid, the command will also fail and no contact is created.
Tips:
A contact can have any number of tags (including 0)
You can use the command alias
addctinstead ofaddcontactif you prefer a shorter command word.
Examples:
addcontact n/Betsy-Crowe (Class 2) e/betsycrowe@example.com a/Betsy Street, Block 123, #06-07 p/1234567
Creates a contact with the name "Betsy-Crowe (Class 2)", phone number "1234567", email "betsycrowe@example.com", address "Betsy Street, Block 123, #06-07"addcontact n/John s/o Doe p/98765432 e/johnd@example.com a/311, Clementi Ave 2, #02-25 c/CS2103T T10 1 ass/Assignment 1 t/friends owesMoney
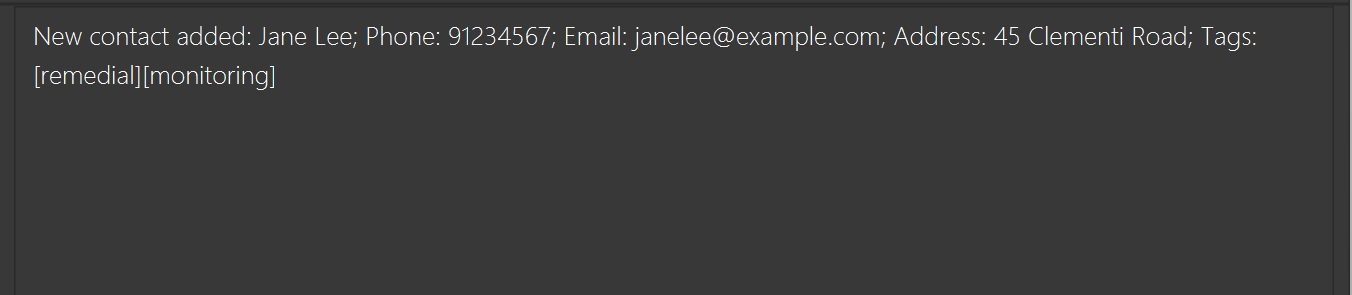
Creates a contact with the name "John s/o Doe", phone number "98765432", email "johnd@example.com", address "311, Clementi Ave 2, #02-25", allocated to class group "CS2103T T10 1" and assignment "Assignment 1", with tags "friends" and "owesMoney".addct n/Jane Lee p/91234567 e/janelee@example.com a/45 Clementi Road t/monitoring remedial
Creates a contact using the alias commandaddct, with tags "monitoring" and "remedial".The screenshot below illustrates the expected display result of the last example.
Adding classes: addclass
Adds a class to the address book.
Format: addclass c/CLASS_NAME [ct/CONTACT_INDICES...]
Creates a class with the specified
CLASS_NAME. TheCLASS_NAMEmust only contain alphanumeric characters, spaces, hyphens-, and parentheses(), subject to the following constraints:The class name should not be blank.
Hyphens
-must be between two alphanumeric characters.Parentheses must:
Not be at the start of the name
Contain only spaces and alphanumeric characters, with at least 1 alphanumeric character
Be properly closed (No nesting allowed)
Open parenthesis
(must be immediately followed by an alphanumeric characterClosing parenthesis
)must be immediately preceded by an alphanumeric character.
CLASS_NAMEshould not match the name of any existing class (space-less and case-insensitive matching). If you wish to add multiple different classes with the same name, you are advised to disambiguate them manually (e.g. with parentheses and/or hyphens).ct/CONTACT_INDICES...is optional and can be used to allocate the class to specific contacts upon creation. If thect/prefix is included, at least 1 contact index must be specified.These
CONTACT_INDICES...must contain 1 or more positive integers 1, 2, 3, ..., referring to the index number shown in the displayed contact list.
Warnings:
If any of the specified contacts do not exist, the command will fail and no class is created.
If any of the parameters are invalid, the command will also fail and no class is created.
The contact indices specified refer to the currently displayed contact list after filtering (e.g., after a
findcontactcommand). It is recommended to runlist contactsbefore this command to ensure the correct contact indices are used.
Tips:
- You can use the command alias
addcinstead ofaddclassif you prefer a shorter command word.
Examples:
addclass c/CS2103T-T10-1 (NUS)
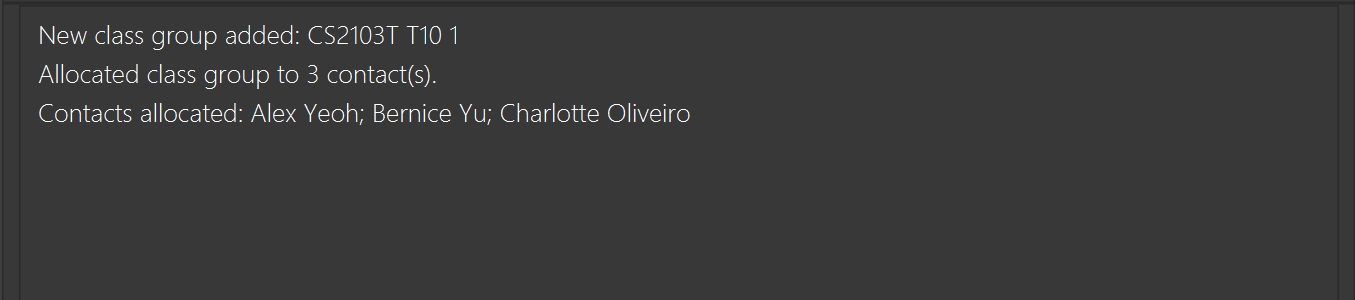
Creates a class with the name "CS2103T-T10-1 (NUS)".list contactsfollowed byaddclass c/CS2103T T10 1 ct/1 2 3
Creates a class with the name "CS2103T T10 1" allocated to the 1st, 2nd, and 3rd contacts.The screenshot below illustrates the expected display result of the last example.
Allocating classes to contacts: allocclass
Allocates a class to specific contacts.
Format: allocclass c/CLASS_NAME ct/CONTACT_INDICES...
The
CLASS_NAMEmust match the name of an existing class (space-less and case-insensitive matching).These
CONTACT_INDICES...must contain 1 or more positive integers 1, 2, 3, ..., referring to the index number shown in the displayed contact list.
Warnings:
If any of the specified contacts or class do not exist, the command will fail and no allocation is done.
If any of the parameters are invalid, the command will also fail and no allocation is done.
The contact indices specified refer to the currently displayed contact list after filtering (e.g., after a
findcontactcommand). It is recommended to runlist contactsbefore this command to ensure the correct contact indices are used.Reallocating a class to a contact that already belongs to that class will not cause any changes to the contact's class memberships. However, if no successful allocations are performed at the end of the command, the command will fail and the user will see an error message specifying the issue.
Allocating a class does not automatically include its assignments, as these are tracked individually by contact. The “allocate by class” feature is designed as a time-saver to help you update several contacts simultaneously. You will need to additionally use the
allocasscommand to allocate specific assignments to the contact if needed.
Tips:
- You can use the command alias
alloccinstead ofallocclassif you prefer a shorter command word.
Examples:
list contactsfollowed byallocclass c/CS2103T T10 1 ct/1
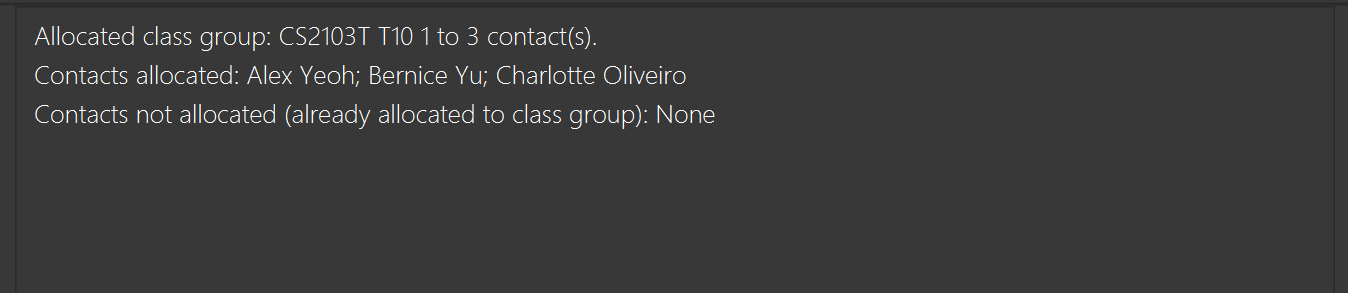
Allocates the class "CS2103T T10 1" to only the 1st contact in the list.list contactsfollowed byallocclass c/CS2103T T10 1 ct/1 2 3
Allocates the class "CS2103T T10 1" to the 1st, 2nd, and 3rd contacts in the list.The screenshot below illustrates the expected display result of the last example.
Unallocating classes from contacts: unallocclass
Unallocates a class from specific contacts.
Format: unallocclass c/CLASS_NAME ct/CONTACT_INDICES...
The
CLASS_NAMEmust match the name of an existing class (space-less and case-insensitive matching).These
CONTACT_INDICES...must contain 1 or more positive integers 1, 2, 3, ..., referring to the index number shown in the displayed contact list.
Warnings:
If any of the specified contacts or class do not exist, the command will fail and no unallocation is done.
If any of the parameters are invalid, the command will also fail and no unallocation is done.
The contact indices specified refer to the currently displayed contact list after filtering (e.g., after a
findcontactcommand). It is recommended to runlist contactsbefore this command to ensure the correct contact indices are used.Unallocating a class from a contact that does not belong to that class will not cause any changes to the contact's class memberships. However, if no successful unallocations are performed at the end of the command, the command will fail and the user will see an error message specifying the issue.
Unallocating a class from a contact does not automatically include unallocating its assignments, as these are tracked individually by contact. The “unallocate by class” feature is designed as a time-saver to help you update several contacts simultaneously. You will need to additionally use the
unallocasscommand to unallocate specific assignments from the contact if needed.
Tips:
- You can use the command alias
unalloccinstead ofunallocclassif you prefer a shorter command word.
Examples:
list contactsfollowed byunallocclass c/CS2103T T10 1 ct/1
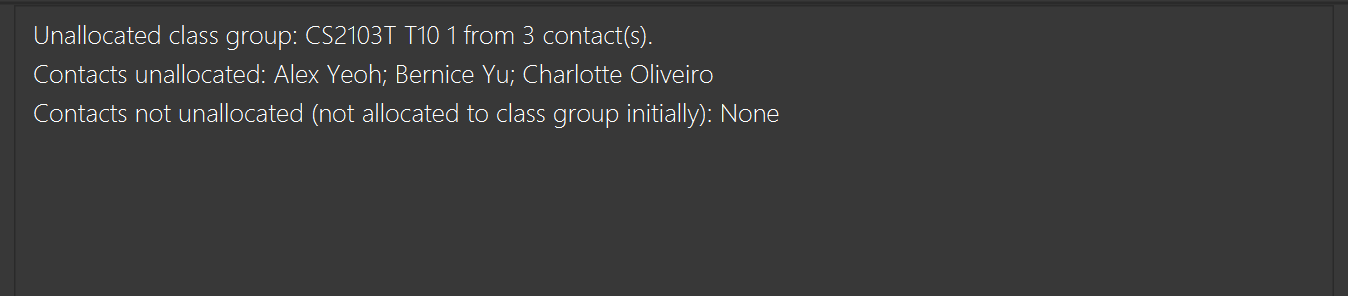
Unallocates the class "CS2103T T10 1" from only the 1st contact in the list.list contactsfollowed byunallocclass c/CS2103T T10 1 ct/1 2 3
Unallocates the class "CS2103T T10 1" from the 1st, 2nd, and 3rd contacts in the list.The screenshot below illustrates the expected display result of the last example.
Adding assignments: addass
Adds an assignment to the address book.
Format: addass ass/ASSIGNMENT_NAME d/DEADLINE [c/CLASS_NAME] [ct/CONTACT_INDICES...]
Creates an assignment with the specified
ASSIGNMENT_NAMEandDEADLINE.The
ASSIGNMENT_NAMEmust only contain alphanumeric characters, spaces, hyphens-, and parentheses(), subject to the following constraints:The assignment name should not be blank.
Hyphens
-must be between two alphanumeric characters.Parentheses must:
Not be at the start of the name
Contain only spaces and alphanumeric characters, with at least 1 alphanumeric character
Be properly closed (No nesting allowed)
Open parenthesis
(must be immediately followed by an alphanumeric characterClosing parenthesis
)must be immediately preceded by an alphanumeric character.
ASSIGNMENT_NAMEshould not match the name of any existing assignment (space-less and case-insensitive matching). If you wish to add multiple different assignments with the same name but for different classes, you are advised to disambiguate them manually (e.g. with parentheses and/or hyphens).The
DEADLINEprovided must be in the formatdd-MM-yyyy HH:mm.c/CLASS_NAMEis optional and can be used to allocate the assignment to all contacts in that class. If thec/prefix is included, theCLASS_NAMEmust match the name of an existing class (space-less and case-insensitive matching).ct/CONTACT_INDICES...is optional and can be used to allocate the assignment to specific contacts. If thect/prefix is included, at least 1 contact index must be specified.These
CONTACT_INDICES...must be positive integers 1, 2, 3, ..., referring to the index number shown in the displayed contact list.
Warnings:
If any of the specified contacts or classes do not exist, the command will fail and no assignment is created.
If any of the other parameters are invalid, the command will also fail and no assignment is created.
The contact indices specified refer to the currently displayed contact list after filtering (e.g., after a
findcontactcommand). It is recommended to runlist contactsbefore this command to ensure the correct contact indices are used.If the specified class does not contain any students, the command will fail and no assignment is created.
The deadline stored in
addressbook.jsonis in GMT. Any direct modifications toaddressbook.jsonmust ensure that date and time values are in GMT, otherwise the user will see incorrect deadlines in the app and may encounter issues when trying to update submission statuses or grading information for those assignments.
Tips:
You can enter both the
c/CLASS_NAMEandct/CONTACT_INDICES...parameters to allocate the assignment to specific contacts at the time of creation. This is optional and can also be done later using theallocasscommand.The deadline will be based on the timezone set in
preferences.json. By default, this is set to GMT +8, but you can change it to your local timezone if needed. Acceptable values range from -18 to 18, and any invalid or missing timezone values will default to GMT +8.
Examples:
addass ass/Assignment-1 (CS2103T) d/01-12-2023 23:59
Creates an assignment with the name "Assignment-1 (CS2103T)" and deadline "1 Dec 2023 11.59pm".addass ass/Assignment 2 d/15-12-2023 23:59 c/CS2103T-T10-1 (NUS)
Creates an assignment with the name "Assignment 2" and deadline "15 Dec 2023 11.59pm", allocated to all contacts belonging to class "CS2103T-T10-1 (NUS)".list contactsfollowed byaddass ass/Assignment 3 d/30-12-2023 23:59 ct/1 2 3
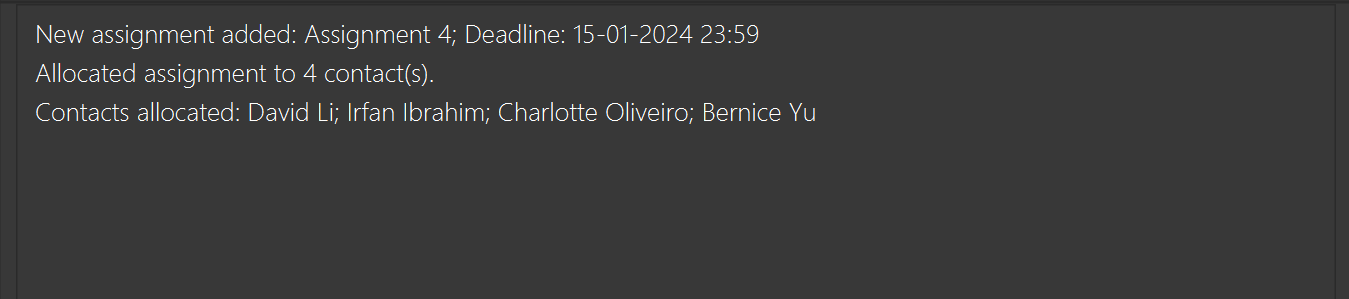
Creates an assignment with the name "Assignment 3" and deadline "30 Dec 2023 11.59pm", allocated to the 1st, 2nd, and 3rd contacts in the list.list contactsfollowed byaddass ass/Assignment 4 d/15-01-2024 23:59 c/CS2103T T10 1 ct/4 5
Creates an assignment with the name "Assignment 4" and deadline "15 Jan 2024 11.59pm", allocated to the 4th and 5th contacts in the list, as well as all contacts belonging to class "CS2103T T10 1".The screenshot below illustrates the expected display result of the last example, where the class "CS2103T T10 1" consists of contacts 2-5.
Allocating assignments to contacts: allocass
Allocates an assignment to specific contacts.
Format: allocass ass/ASSIGNMENT_NAME [c/CLASS_NAME] [ct/CONTACT_INDICES...]
Allocates the assignment to the specified contacts, as well as all contacts in the specified class.
The
ASSIGNMENT_NAMEmust match the name of an existing assignment (space-less and case-insensitive matching).At least 1 of
[c/CLASS_NAME]or[ct/CONTACT_INDICES...]must be provided.The
CLASS_NAMEmust match the name of an existing class (space-less and case-insensitive matching).The
CONTACT_INDICES...must contain 1 or more positive integers 1, 2, 3, ..., referring to the index number shown in the displayed contact list.By default, the assignment submission status for each allocated contact will be set to
false, and it will be associated with a default score of 0.
Warnings:
If any of the specified contacts or classes do not exist, the command will fail and no allocation is done.
If any of the parameters are invalid, the command will also fail and no allocation is done.
The contact indices specified refer to the currently displayed contact list after filtering (e.g., after a
findcontactcommand). It is recommended to runlist contactsbefore this command to ensure the correct contact indices are used.If the specified class does not contain any students, the command will fail and no allocation is done.
If no contacts are allocated at the end of the command, the command will fail and the user will see an error message specifying the issue.
Tips:
- You can enter both the
c/CLASS_NAMEandct/CONTACT_INDICES...parameters to allocate the assignment to more contacts at the same time.
Examples:
allocass ass/Assignment 1 ct/1 2 3
Allocates the "Assignment 1" to the 1st, 2nd, and 3rd contacts in the list.allocass ass/Assignment 2 c/CS2103T T10 1
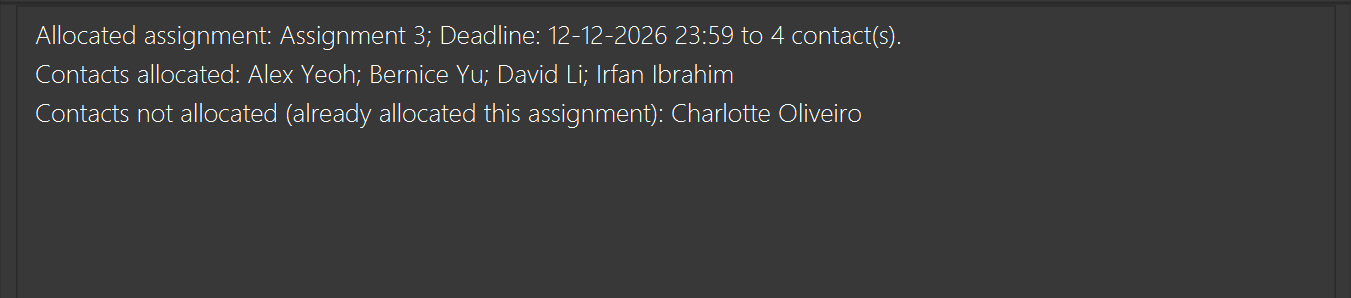
Allocates the "Assignment 2" to all contacts in the "CS2103T T10 1" class.allocass ass/Assignment 3 c/CS2103T T10 1 ct/1 2 3
Allocates the "Assignment 3" to the 1st, 2nd, and 3rd contacts in the list, as well as all contacts belonging to class "CS2103T T10 1".The screenshot below illustrates the expected display result of the last example, where the class "CS2103T T10 1" contains contacts 2-5, and contact 3 was already allocated the assignment.
Unallocating assignments from contacts: unallocass
Unallocates an assignment from specific contacts.
Format: unallocass ass/ASSIGNMENT_NAME [c/CLASS_NAME] [ct/CONTACT_INDICES...]
Unallocates the assignment from the specified contacts, as well as all contacts in the specified class.
The
ASSIGNMENT_NAMEmust match the name of an existing assignment (space-less and case-insensitive matching).At least 1 of
[c/CLASS_NAME]or[ct/CONTACT_INDICES...]must be provided.The
CLASS_NAMEmust match the name of an existing class (space-less and case-insensitive matching).The
CONTACT_INDICES...must contain 1 or more positive integers 1, 2, 3, ..., referring to the index number shown in the displayed contact list.
Warnings:
If any of the specified contacts or classes do not exist, the command will fail and no unallocation is done.
If any of the parameters are invalid, the command will also fail and no unallocation is done.
The contact indices specified refer to the currently displayed contact list after filtering (e.g., after a
findcontactcommand). It is recommended to runlist contactsbefore this command to ensure the correct contact indices are used.If the specified class does not contain any students, the command will fail and no unallocation is done.
If no contacts are unallocated at the end of the command, the command will fail and the user will see an error message specifying the issue.
Tips:
- You can enter both the
c/CLASS_NAMEandct/CONTACT_INDICES...parameters to unallocate the assignment from more contacts at the same time.
Examples:
unallocass ass/Assignment 1 ct/1 2 3
Unallocates the "Assignment 1" from the 1st, 2nd, and 3rd contacts in the list.unallocass ass/Assignment 2 c/CS2103T T10 1
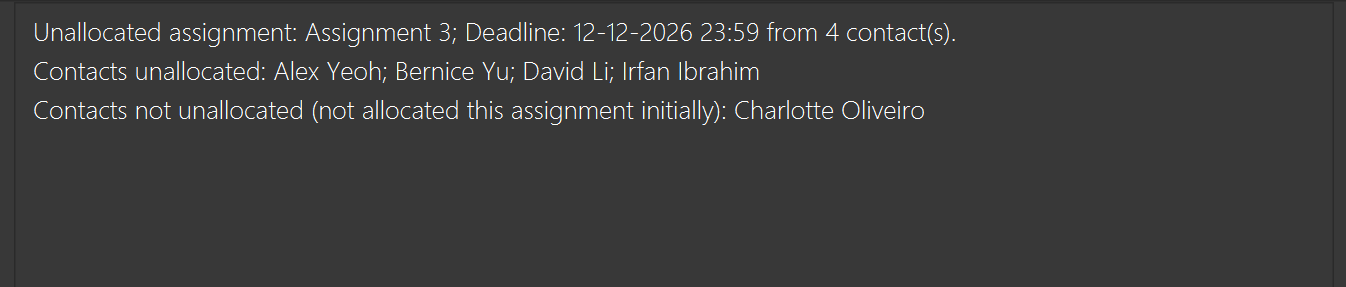
Unallocates the "Assignment 2" from all contacts in the "CS2103T T10 1" class.unallocass ass/Assignment 3 c/CS2103T T10 1 ct/1 2 3
Unallocates the "Assignment 3" from the 1st, 2nd, and 3rd contacts in the list, as well as all contacts belonging to class "CS2103T T10 1".The screenshot below illustrates the expected display result of the last example, where the class "CS2103T T10 1" contains contacts 2-5, and only contacts 1, 2, 4, and 5 had the assignment allocated.
Marking assignments as submitted for contacts: submit
Marks a specific assignment as submitted for the specified contacts.
Format: submit ass/ASSIGNMENT_NAME [c/CLASS_NAME] [ct/CONTACT_INDICES...] [d/SUBMISSION_DATE]
Marks the assignment as submitted for the specified contacts, as well as all contacts in the specified class.
By default, the grade associated with the submission will remain as 0 until explicitly graded otherwise.
If the assignment is already submitted for the specified contact, the submission status and submission date will not be updated.
The
ASSIGNMENT_NAMEmust match the name of an existing assignment (space-less and case-insensitive matching).At least 1 of
[c/CLASS_NAME]or[ct/CONTACT_INDICES...]must be provided.The
CLASS_NAMEmust match the name of an existing class (space-less and case-insensitive matching).The
CONTACT_INDICES...must contain 1 or more positive integers 1, 2, 3, ..., referring to the index number shown in the displayed contact list.The
SUBMISSION_DATEmust be in the formatdd-MM-yyyy HH:mmand refer to a valid date before the current date and time.
Warnings:
If any of the specified contacts or classes do not exist, the command will fail and no assignments will be marked as submitted.
If any of the parameters are invalid, the command will also fail and no assignments will be marked as submitted.
The contact indices specified refer to the currently displayed contact list after filtering (e.g., after a
findcontactcommand). It is recommended to runlist contactsbefore this command to ensure the correct contact indices are used.If the specified class does not contain any students, the command will fail and no assignments will be marked as submitted.
If no contacts are marked as submitted at the end of the command, the command will fail and the user will see an error message specifying the issue.
The submission date and time stored in
addressbook.jsonis in GMT. Any direct modifications toaddressbook.jsonmust ensure that date and time values are in GMT, otherwise the user will see incorrect submission dates in the app and may encounter issues when trying to update submission statuses or grading information for those assignments.It is recommended to use the
submitcommand to mark assignments as submitted, as the app will automatically convert the specified submission date and time from the user's local timezone to GMT before storing it inaddressbook.json.
Tips:
You may omit the
d/SUBMISSION_DATEparameter to use the current date and time as the submission date.The submission date and time will be based on the timezone set in
preferences.json. By default, this is set to GMT +8, but you can change it to your local timezone if needed. Acceptable values range from -18 to 18, and any invalid or missing timezone values will default to GMT +8.
Examples:
submit ass/Assignment 1 ct/1 2 3
Marks "Assignment 1" as submitted for the 1st, 2nd, and 3rd contacts in the list.submit ass/Assignment 2 c/CS2103T T10 1
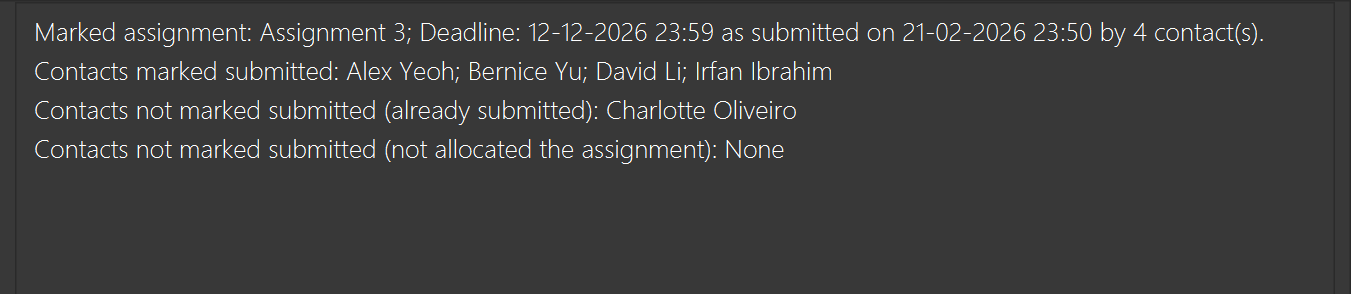
Marks "Assignment 2" as submitted for all contacts belonging to "CS2103T T10 1".submit ass/Assignment 3 c/CS2103T T10 1 ct/1 2 3 d/21-02-2026 23:50
Marks "Assignment 3" as submitted for the 1st, 2nd, and 3rd contacts in the list, as well as all other contacts belonging to "CS2103T T10 1", with the specified submission date and time: 21 Feb 2026 11.50pm.The screenshot below illustrates the expected display result of the last example, where the class "CS2103T T10 1" contains contacts 2-5, and contact 3 already has the assignment submitted.
Marking assignments as unsubmitted for contacts: unsubmit
Marks a specific assignment as unsubmitted for the specified contacts.
Format: unsubmit ass/ASSIGNMENT_NAME [c/CLASS_NAME] [ct/CONTACT_INDICES...]
Marks the assignment as unsubmitted for the specified contacts, as well as all contacts in the specified class.
If the assignment is not submitted for the specified contact, then it will not be updated.
The
ASSIGNMENT_NAMEmust match the name of an existing assignment (space-less and case-insensitive matching).At least 1 of
[c/CLASS_NAME]or[ct/CONTACT_INDICES...]must be provided.The
CLASS_NAMEmust match the name of an existing class (space-less and case-insensitive matching).The
CONTACT_INDICES...must contain 1 or more positive integers 1, 2, 3, ..., referring to the index number shown in the displayed contact list.
Warnings:
Unsubmitting the assignment will also remove the submission date, and any grading information (score, grading date) associated with it.
If any of the specified contacts or classes do not exist, the command will fail and no assignments will be marked as unsubmitted.
If any of the parameters are invalid, the command will also fail and no assignments will be marked as unsubmitted.
The contact indices specified refer to the currently displayed contact list after filtering (e.g., after a
findcontactcommand). It is recommended to runlist contactsbefore this command to ensure the correct contact indices are used.If the specified class does not contain any students, the command will fail and no assignments will be marked as unsubmitted.
If no contacts are marked as unsubmitted at the end of the command, the command will fail and the user will see an error message specifying the issue.
Tips:
- You can enter both the
c/CLASS_NAMEandct/CONTACT_INDICES...parameters to unsubmit the assignment from more contacts at the same time.
Examples:
unsubmit ass/Assignment 1 ct/1 2 3
Marks "Assignment 1" as unsubmitted for the 1st, 2nd, and 3rd contacts in the list.unsubmit ass/Assignment 2 c/CS2103T T10 1
Marks "Assignment 2" as unsubmitted for all contacts belonging to "CS2103T T10 1".unsubmit ass/Assignment 3 c/CS2103T T10 1 ct/1 2 3
Marks "Assignment 3" as unsubmitted for the 1st, 2nd, and 3rd contacts in the list, as well as all other contacts belonging to "CS2103T T10 1".The screenshot below illustrates the expected display result of the last example, where the class "CS2103T T10 1" contains contacts 2-5, and contact 3 did not have the assignment submitted.

Grading assignments for contacts: grade
Grades a specific assignment for the specified contacts with a score.
Format: grade ass/ASSIGNMENT_NAME s/SCORE [c/CLASS_NAME] [ct/CONTACT_INDICES...] [d/GRADING_DATE]
Marks an assignment as graded for the specified contacts, as well as contacts in the specified class, with the specified score and grading date.
If the assignment is already graded or not submitted for the specified contact, the grading status and grading date will not be updated.
The
ASSIGNMENT_NAMEmust match the name of an existing assignment (space-less and case-insensitive matching).At least 1 of
[c/CLASS_NAME]or[ct/CONTACT_INDICES...]must be provided.The
CLASS_NAMEmust match the name of an existing class (space-less and case-insensitive matching).The
CONTACT_INDICES...must contain 1 or more positive integers 1, 2, 3, ..., referring to the index number shown in the displayed contact list.The
SCOREmust be a decimal number between 0 and 100 (inclusive), and will be rounded to 1 decimal place.The
GRADING_DATEmust be in the formatdd-MM-yyyy HH:mmand refer to a valid date before the current date and time and after the submission date and time.
Warnings:
An assignment must be submitted before it can be graded. If you try to grade an assignment that is not submitted for a contact, the assignment will not be graded for that contact.
No matter the number of decimal places specified for the score, it will be rounded to 1 decimal place. For example, if you enter
s/85.6500, the score will be recorded as85.7.If any of the specified contacts or classes do not exist, the command will fail and no assignments will be graded.
If any of the parameters are invalid, the command will also fail and no assignments will be graded.
The contact indices specified refer to the currently displayed contact list after filtering (e.g., after a
findcontactcommand). It is recommended to runlist contactsbefore this command to ensure the correct contact indices are used.If the specified class does not contain any students, the command will fail and no assignments will be graded.
If no contacts are graded at the end of the command, the command will fail and the user will see an error message specifying the issue.
The grading date and time stored in
addressbook.jsonis in GMT. Any direct modifications toaddressbook.jsonmust ensure that date and time values are in GMT, otherwise the user will see incorrect grading dates in the app and may encounter issues when trying to update grading information for those assignments.It is recommended to use the
gradecommand to mark assignments as graded, as the app will automatically convert the specified grading date and time from the user's local timezone to GMT before storing it inaddressbook.json.
Tips:
You may omit the
d/GRADING_DATEparameter to use the current date and time as the grading date.The grading date and time will be based on the timezone set in
preferences.json. By default, this is set to GMT +8, but you can change it to your local timezone if needed. Acceptable values range from -18 to 18, and any invalid or missing timezone values will default to GMT +8.
Examples:
grade ass/Assignment 1 ct/1 2 3 s/85.5
Grades "Assignment 1" with a score of 85.5 for the 1st, 2nd, and 3rd contacts in the list, with the current date and time as the grading date.grade ass/Assignment 2 c/CS2103T T10 1 s/75.0
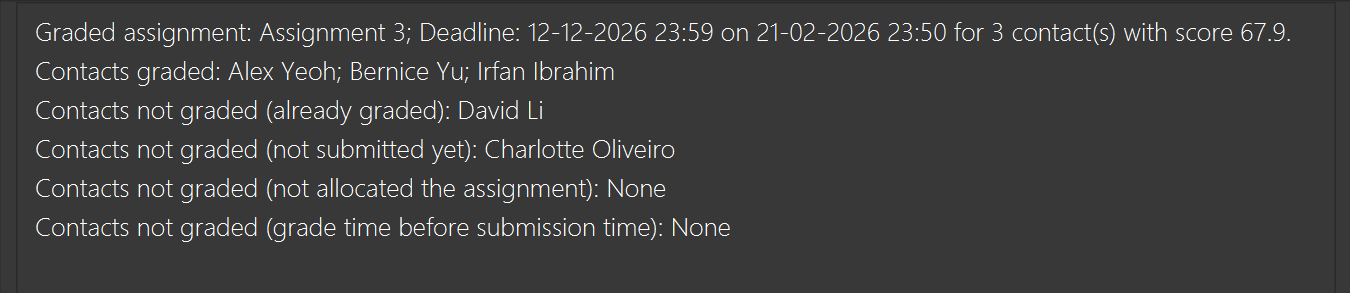
Grades "Assignment 2" with a score of 75.0 for all contacts in the class "CS2103T T10 1", with the current date and time as the grading date.grade ass/Assignment 3 c/CS2103T T10 1 ct/1 2 3 s/67.9 d/21-02-2026 23:50
Grades "Assignment 3" with a score of 67.9 for the 1st, 2nd, and 3rd contacts in the list, as well as all other contacts in "CS2103T T10 1", with 21 Feb 2026 11.50pm as the grading date.The screenshot below illustrates the expected display result of the last example, where the class "CS2103T T10 1" contains contacts 2-5, contact 3 did not have the assignment submitted, and contact 4 submitted but the assignment was already graded.
Ungrading assignments for contacts: ungrade
Ungrades a specific assignment for the specified contacts.
Format: ungrade ass/ASSIGNMENT_NAME [c/CLASS_NAME] [ct/CONTACT_INDICES...]
Marks an assignment as ungraded for the specified contacts, as well as contacts in the specified class.
If the assignment is not graded for the specified contact, then it will not be updated.
The
ASSIGNMENT_NAMEmust match the name of an existing assignment (space-less and case-insensitive matching).At least 1 of
[c/CLASS_NAME]or[ct/CONTACT_INDICES...]must be provided.The
CLASS_NAMEmust match the name of an existing class (space-less and case-insensitive matching).The
CONTACT_INDICES...must contain 1 or more positive integers 1, 2, 3, ..., referring to the index number shown in the displayed contact list.
Warnings:
Ungrading the assignment will remove both the grading date and score.
If any of the specified contacts or classes do not exist, the command will fail and no assignments will be ungraded.
If any of the parameters are invalid, the command will also fail and no assignments will be ungraded.
The contact indices specified refer to the currently displayed contact list after filtering (e.g., after a
findcontactcommand). It is recommended to runlist contactsbefore this command to ensure the correct contact indices are used.If the specified class does not contain any students, the command will fail and no assignments will be ungraded.
If no contacts are ungraded at the end of the command, the command will fail and the user will see an error message specifying the issue.
Tips:
- You can enter both the
c/CLASS_NAMEandct/CONTACT_INDICES...parameters to ungrade the assignment from more contacts at the same time.
Examples:
ungrade ass/Assignment 1 ct/1 2 3
Ungrades "Assignment 1" for the 1st, 2nd, and 3rd contacts in the list.ungrade ass/Assignment 2 c/CS2103T T10 1
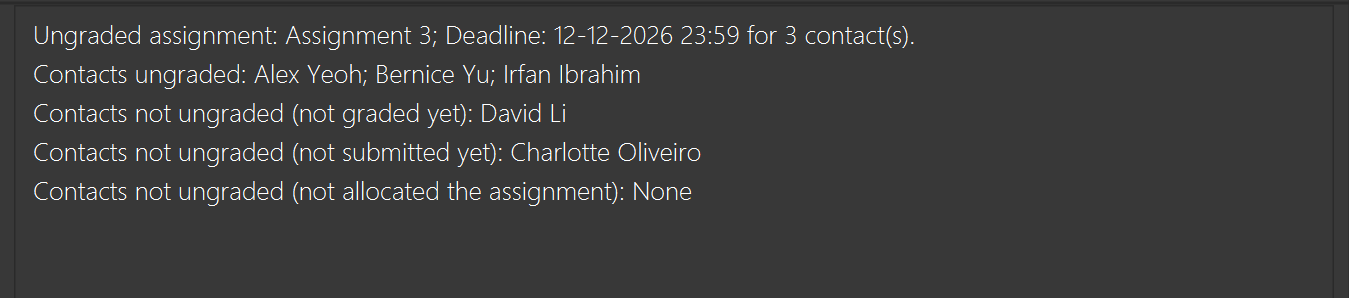
Ungrades "Assignment 2" for all contacts in the class "CS2103T T10 1".ungrade ass/Assignment 3 c/CS2103T T10 1 ct/1 2 3
Ungrades "Assignment 3" for the 1st, 2nd, and 3rd contacts in the list, as well as all other contacts in "CS2103T T10 1".The screenshot below illustrates the expected display result of the last example, where the class "CS2103T T10 1" contains contacts 2-5, contact 3 did not have the assignment submitted, and contact 4 submitted but the assignment was not graded yet.
Listing all contacts : list contacts
Shows a list of all contacts in the address book.
Format: list contacts
If your address book is completely empty (no contacts have been added yet), running this command will simply display an empty list. It will not generate an error.
The tab will be automatically switched to
Contactsupon successful execution.The result box will display the message:
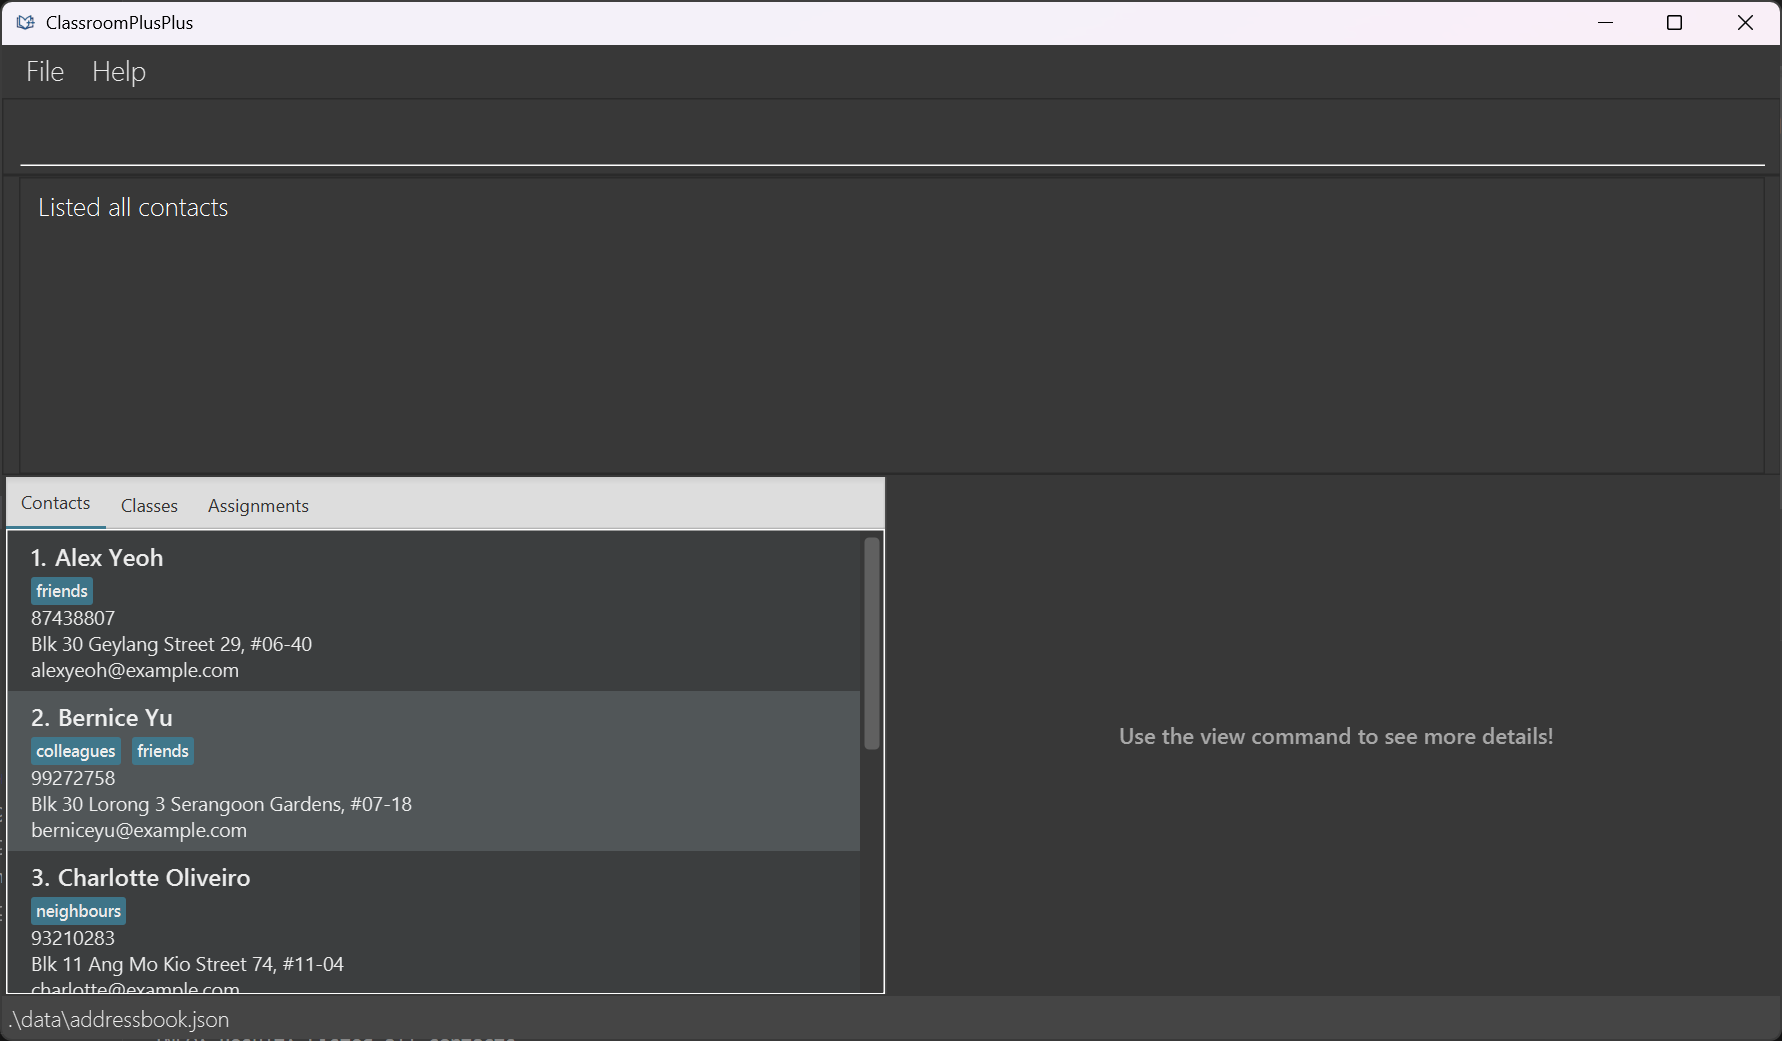
Listed all contactsThe command does not accept any additional arguments. If you type extra words (e.g.,
list contacts cs2103t), the system will reject it and display anInvalid command format!error.
Tips:
You may also click on the tabs to switch between
Contacts,Classes, andAssignments. Note that this will not affect any existing filters on the displayed lists, unlike thelist <TAB>command which will clear all filters and show all items in that category.You can use the tab alias
ctinstead ofcontactsif you prefer a shorter command. The commandlist ctwill have the same effect aslist contacts.
Listing all classes : list classes
Shows a list of all classes in the address book.
Format: list classes
If no classes have been added yet, running this command will simply display an empty list. It will not generate an error.
The tab will be automatically switched to
Classesupon successful execution.The result box will display the message:
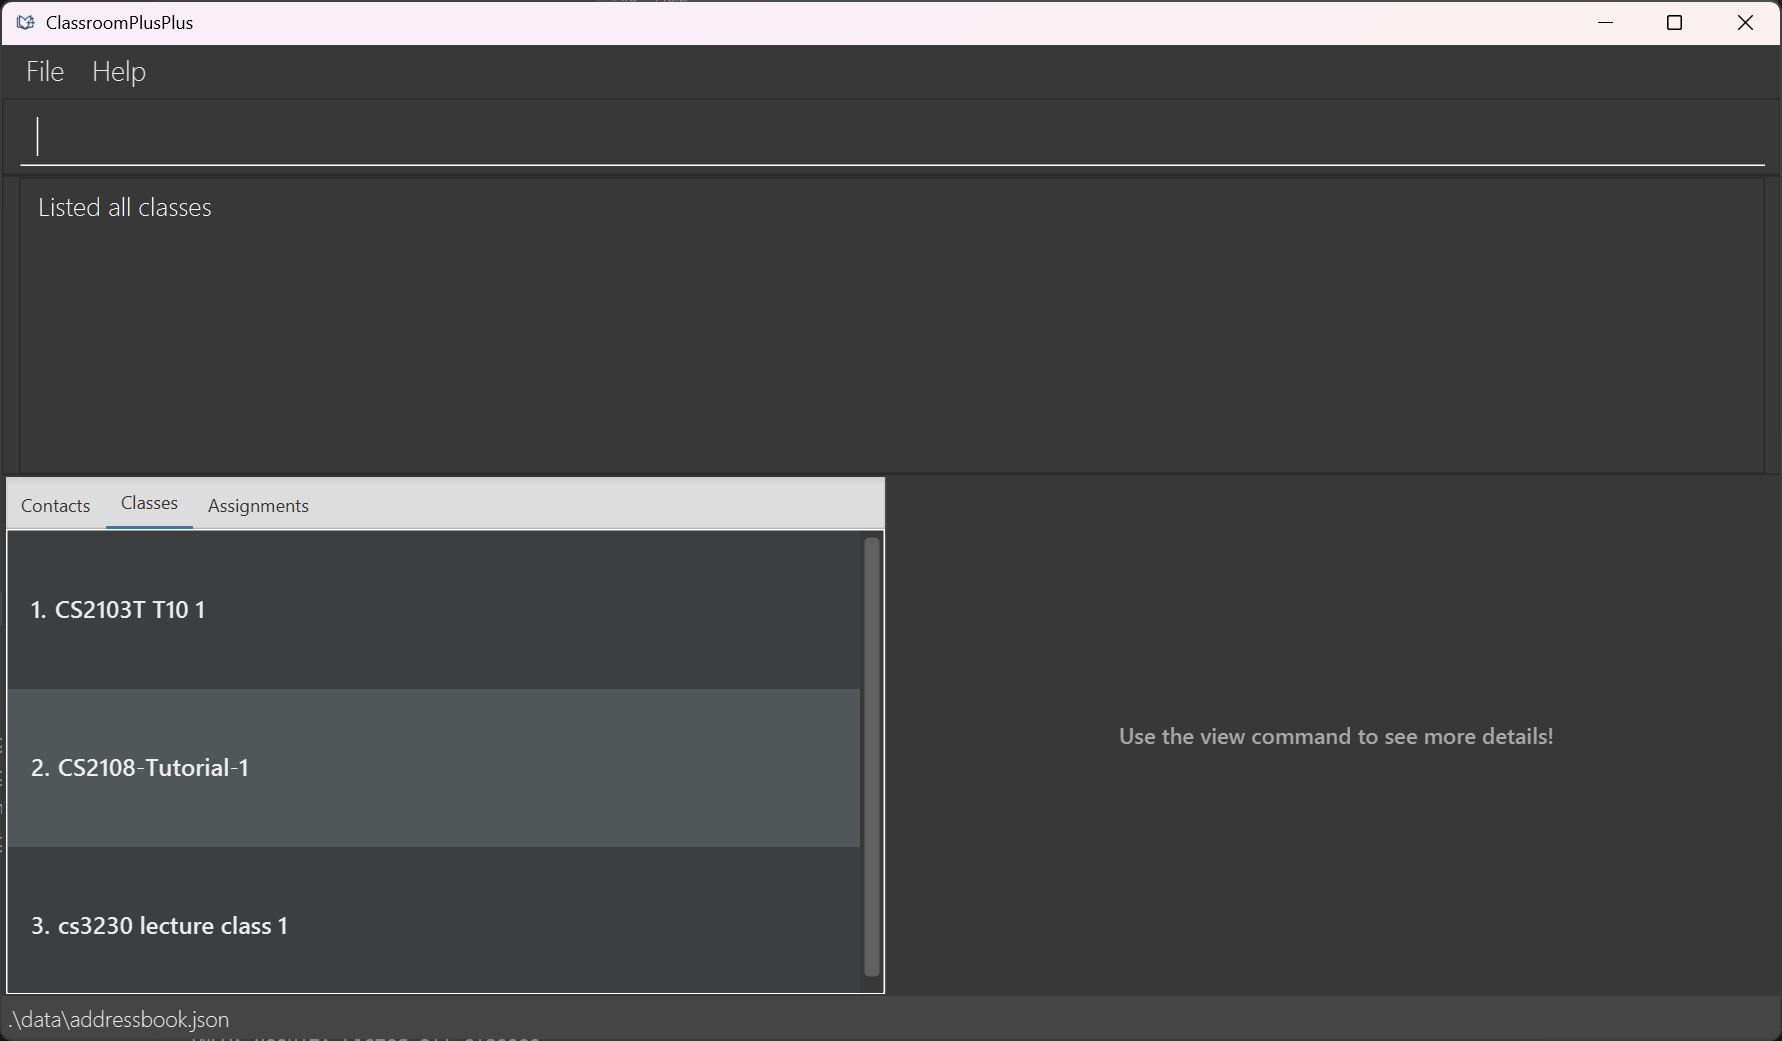
Listed all classesThe command does not accept any additional arguments. If you type extra words (e.g.,
list classes cs2103t), the system will reject it and display anInvalid command format!error.
Tips:
You may also click on the tabs to switch between
Contacts,Classes, andAssignments. Note that this will not affect any existing filters on the displayed lists, unlike thelist <TAB>command which will clear all filters and show all items in that category.You can use the tab alias
cinstead ofclassesif you prefer a shorter command. The commandlist cwill have the same effect aslist classes.
Listing all assignments : list assignments
Shows a list of all assignments in the address book.
Format: list assignments
If your assignment list is completely empty (no assignments have been added yet), running this command will simply display an empty list. It will not generate an error.
The tab will be automatically switched to
Assignmentsupon successful execution.The result box will display the message:
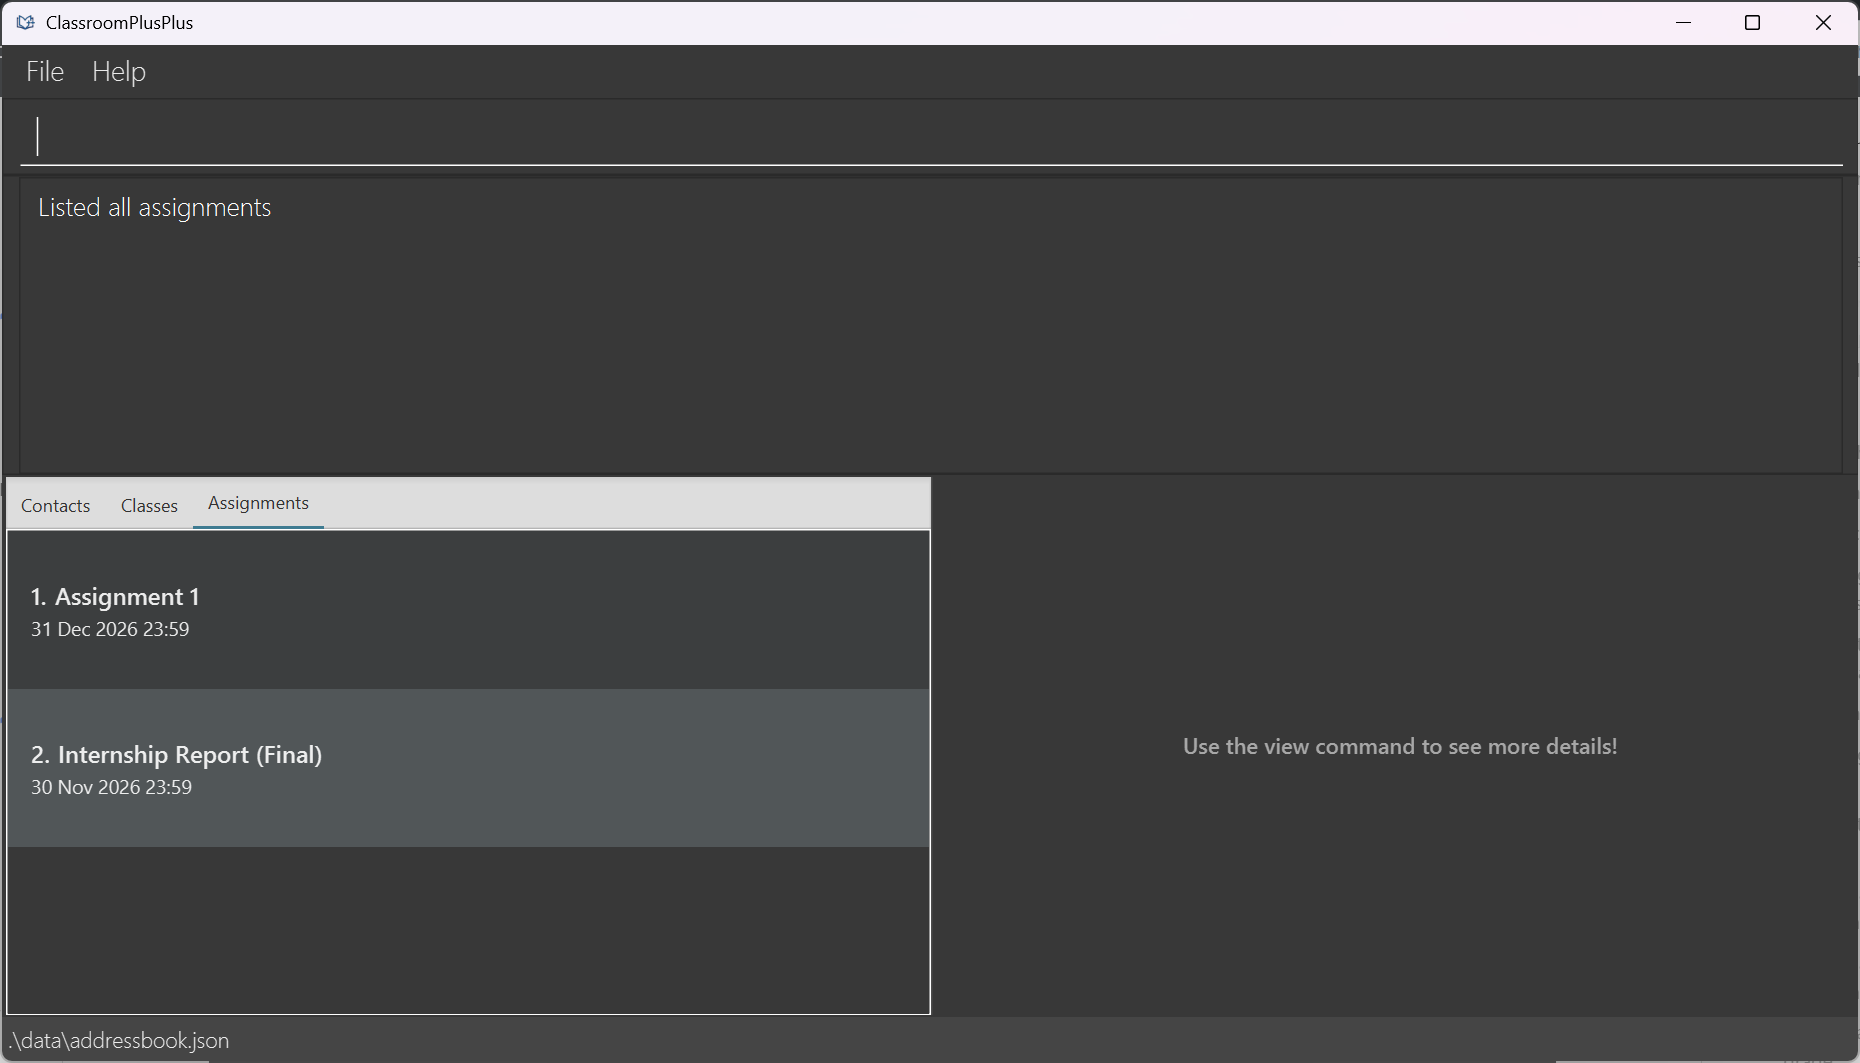
Listed all assignmentsThe command does not accept any additional arguments. If you type extra words (e.g.,
list assignments cs2103t), the system will reject it and display anInvalid command format!error.
Tips:
You may also click on the tabs to switch between
Contacts,Classes, andAssignments. Note that this will not affect any existing filters on the displayed lists, unlike thelist <TAB>command which will clear all filters and show all items in that category.You can use the tab alias
assinstead ofassignmentsif you prefer a shorter command. The commandlist asswill have the same effect aslist assignments.
Finding contacts : findcontact
Finds and displays contacts based on the specified criteria. You can search by contact name, by phone number, or by email. Substring matching will be performed, and matching is case-insensitive.
Format:
findcontact n/CONTACT_NAME_SEARCH_STRING— search by namefindcontact p/PHONE_NUMBER_SEARCH_STRING— search by phone numberfindcontact e/EMAIL_SEARCH_STRING— search by email address
Name search
n/: The command will find contacts whose names contain the specified substring (case-insensitive). For example,findcontact n/alicewill return all contacts whose name contains "alice".Phone search
p/: Searches for contacts by phone number.Email search
e/: Searches for contacts by email address. (case-insensitive).All consecutive spaces will be replaced by a single space, and any leading or trailing spaces will be retained. For example,
findcontact n/<4 SPACES> Alice <5 SPACES> Smith <3 SPACES>will find all contacts whose name contains " Alice Smith ". With this search string, "Alice Smith" will not be displayed, but "bob alice smith lang" will be displayed.You cannot use multiple search types in one command. For example,
findcontact p/91234567 e/alice@gmail.comis invalid. Choose one search method per command.The tab will automatically switch to the
Contactstab upon successful execution.The search results will remain filtered until you run another command that filters the list (e.g., another
findcontactcommand) or uselist contactsto show all contacts again.
Warnings:
- Each prefix (
n/,p/,e/) must have a value. Using a prefix with no value (e.g.,findcontact p/) will result in an error.
Tips:
If you would like to preserve the current filter but switch to a different tab, you may manually click on the
ClassesorAssignmentstab. Note that clicking on the tabs will not clear existing filters, so you can still see the filtered contacts when you switch back to theContactstab.You may use the command alias
findctinstead offindcontactif you prefer a shorter command.
Examples:
findcontact n/alice
Finds all contacts whose name contains "alice" (case-insensitive).findct n/john doe
Using the abbreviated command, finds all contacts whose name contains "john doe".findcontact p/91234567
Finds all contacts with phone number containing "91234567".findcontact e/gmail.com
Finds all contacts with email containing "gmail.com".
Finding classes : findclass
Finds and displays classes based on the specified criteria. You can search by class name (substring match). Matching is case-insensitive.
Format: findclass c/CLASS_NAME_SEARCH_STRING
Name search
c/: The command will find classes whose names contain the specified substring (case-insensitive). For example,findclass c/CS2103will return all classes whose name contains "CS2103".All consecutive spaces will be replaced by a single space, and any leading or trailing spaces will be retained. For example,
findclass c/<4 SPACES> CS2103 <5 SPACES> Tutorial <3 SPACES>will find all classes whose name contains " CS2103 Tutorial ". With this search string, "CS2103 Tutorial" will not be displayed, but "nus cs2103 tutorial group 10" will be displayed.The tab will automatically switch to the
Classestab upon successful execution.The search results will remain filtered until you run another command that filters the list (e.g., another
findclasscommand) or uselist classesto show all classes again.
Warnings:
CLASS_NAME_SEARCH_STRINGmust not be empty. Using thec/prefix with no value (e.g.,findclass c/) will result in an error, and no filter is applied.
Tips:
If you would like to preserve the current filter but switch to a different tab, you may manually click on the
ContactsorAssignmentstab. Note that clicking on the tabs will not clear existing filters, so you can still see the filtered classes when you switch back to theClassestab.You may use the command alias
findcinstead offindclassif you prefer a shorter command.
Examples:
findclass c/CS2103
Finds all classes whose name contains "CS2103" as a substring (case-insensitive).findclass c/Tutorial Class
Finds all classes whose name contains "Tutorial Class" as a substring (case-insensitive).
Finding assignments : findass
Finds and displays assignments based on the specified criteria. You can search by assignment name (substring match) or by assignment deadline (range match). Matching is case-insensitive.
Format:
findass ass/ASSIGNMENT_NAME_SEARCH_STRING— search by assignment namefindass [ds/DEADLINE_START] [de/DEADLINE_END]— search by assignment deadline
Name search
ass/: The command will find assignments whose names contain the specified text. For example,findass ass/CS2103will find all assignments whose name contains "CS2103".All consecutive spaces will be replaced by a single space, and any leading or trailing spaces will be retained. For example,
findass ass/<4 SPACES> Assignment <5 SPACES> 1 <3 SPACES>will find all assignments whose name contains " Assignment 1 ". With this search string, "Assignment 1" will not be displayed, but "sample assignment 1 worksheet" will be displayed.Deadline search
ds/andde/: Searches for assignments by deadline range (inclusive of start and end points). The deadline values must match exactly one of the supported formats below. At least one of[ds/DEADLINE_START]or[de/DEADLINE_END]must be provided. Omission of the[ds/DEADLINE_START]or[de/DEADLINE_END]indicates no lower or upper bound for the search, respectively.DEADLINEprovided can be of the formatdd-MM-yyyy— date only (e.g.,31-12-2024) ordd-MM-yyyy HH:mm— date with time (e.g.,31-12-2024 23:59). Whendd-MM-yyyyis provided for the start deadline, it is treated as the beginning of the day (12am). However, it will be treated as the end of the day (11.59pm) for end deadline.You cannot use multiple search types in one command. For example,
findass ass/Assignment 1 ds/31-12-2024is invalid. Choose one search method per command.The tab will automatically switch to the
Assignmentstab upon successful execution.The search results will remain filtered until you run another command that filters the list (e.g., another
findasscommand) or uselist assignmentsto show all assignments again.
Warnings:
The deadline prefixes (ds/ and de/) must have a valid date value in the correct format. Using a prefix with no date (e.g.,
findass ds/) will result in an error. Invalid date formats or start dates after end dates will also be rejected.For deadline searches, the time may be omitted. For example, if an assignment has a deadline of
31-12-2024 23:59, searching withfindass ds/31-12-2024will also match it.Any time values provided will be treated as the time in the timezone set in
preferences.json. By default, this is set to GMT +8, but you can change it to your local timezone if needed. Acceptable values range from -18 to 18, and any invalid or missing timezone values will default to GMT +8.
Tips:
You can use spaces in your search string for more specific results. While
findass ass/Assignmentreturns any assignment containing "Assignment", adding a space (e.g.,findass ass/Assignment <1 SPACE>) allows you to target multi-word titles like "Assignment XYZ."If you would like to preserve the current filter but switch to a different tab, you may manually click on the
ContactsorClassestab. Note that clicking on the tabs will not clear existing filters, so you can still see the filtered assignments when you switch back to theAssignmentstab.
Examples:
findass ass/Assignment
Finds all assignments whose name contains "assignment" (case-insensitive).findass ds/31-12-2024
Finds all assignments with a deadline of 31 December 2024 12am or later.findass de/15-01-2025
Finds all assignments with a deadline of 15 January 2025 11.59pm or earlier.findass ds/31-12-2024 15:00 de/15-01-2025 20:00
Finds all assignments with a deadline between 31 December 2024 3pm and 15 January 2025 8pm.
Viewing full details of a contact/class/assignment: view
Shows the full details of a contact, class, or assignment.
View contact details
Format: view ct/CONTACT_INDEX
Shows the full details of the contact at the specified
CONTACT_INDEX.The index refers to the index number shown in the displayed contact list.
The index must be a positive integer 1, 2, 3, …
If the specified index does not exist in the displayed contact list, the command will fail and display an error message.
Warnings:
- Unlike previous listed commands, this
ct/prefix requires exactly one contact index to be provided. If you provide more than one index (e.g.,view ct/1 2), the command will fail and no detailed view of the contact will be displayed.
Tips:
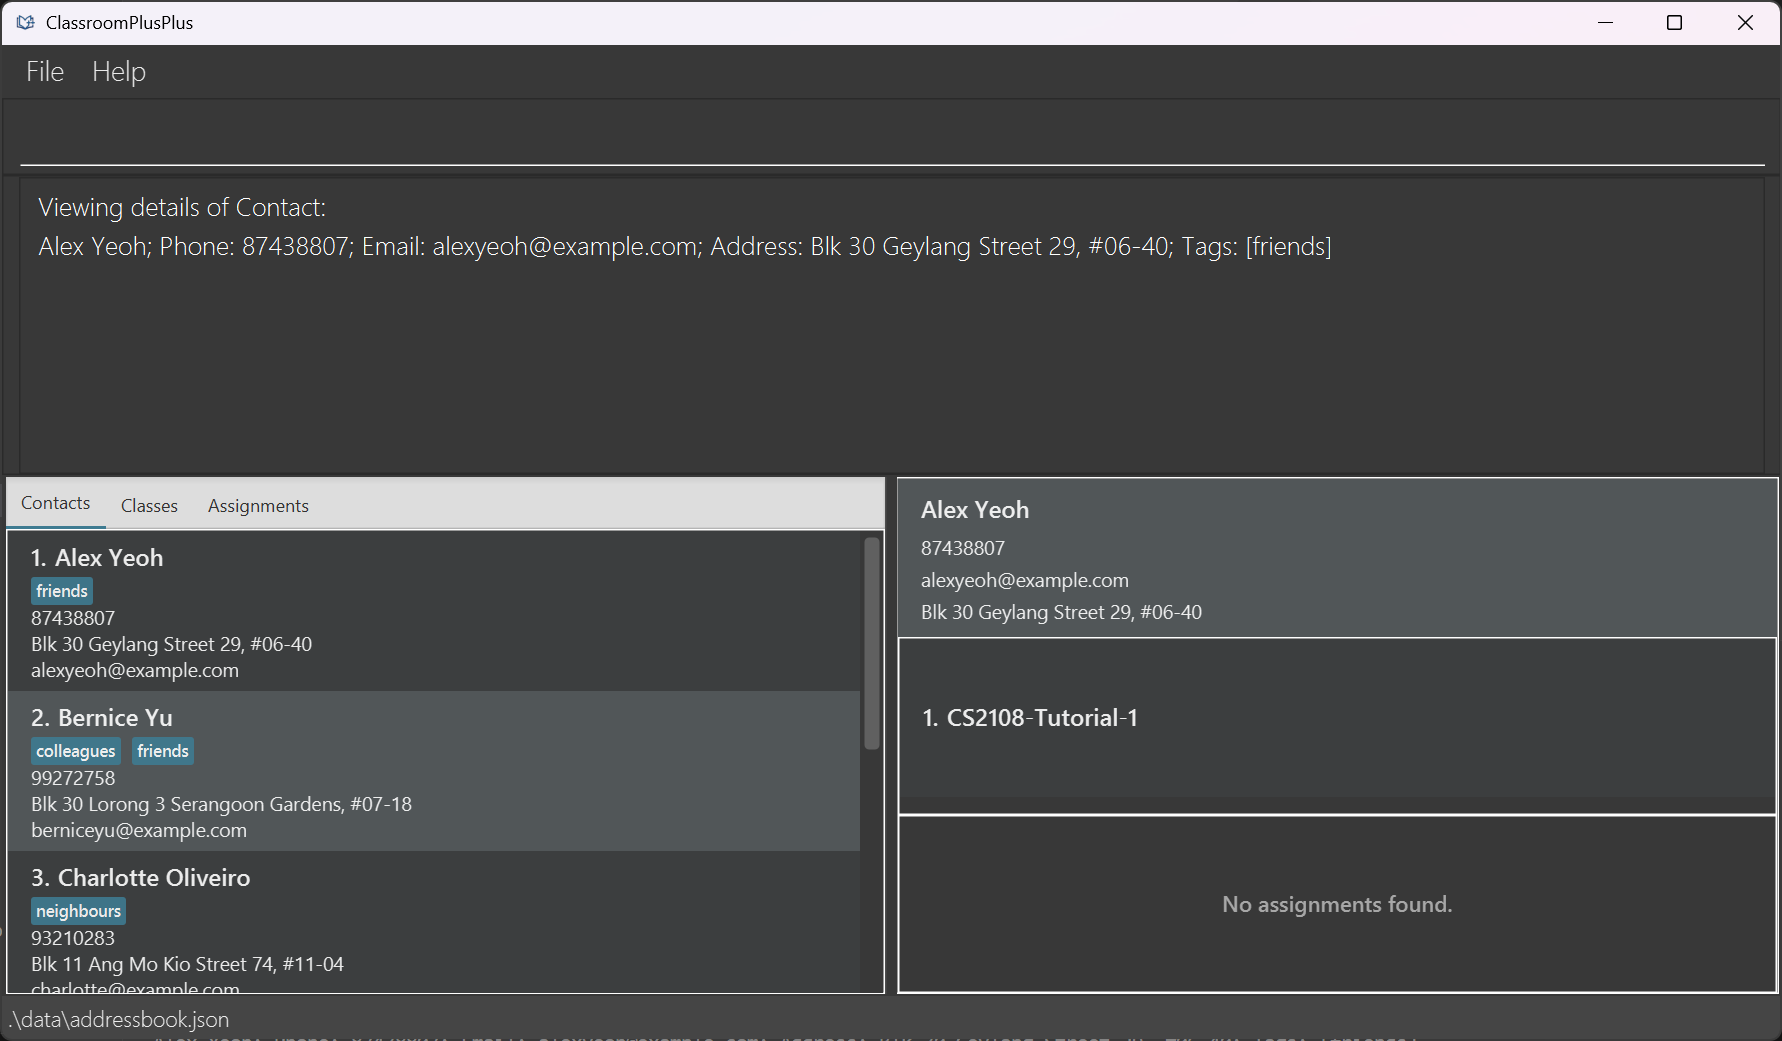
- In the detailed view, you can see the contact's name, phone number, email, classes they belong to, assignments allocated to them, and the submission and grading status for each allocated assignment. Any changes made to the contact's details, class memberships, or assignment allocations will be reflected in real-time in the detailed view as well.
View class details
Format: view c/CLASS_NAME
Shows the full details of the class with the specified
CLASS_NAME.CLASS_NAMEmust match the name of an existing class (space-less and case-insensitive matching).If the specified class does not exist, the command will fail and display an error message.
Tips:
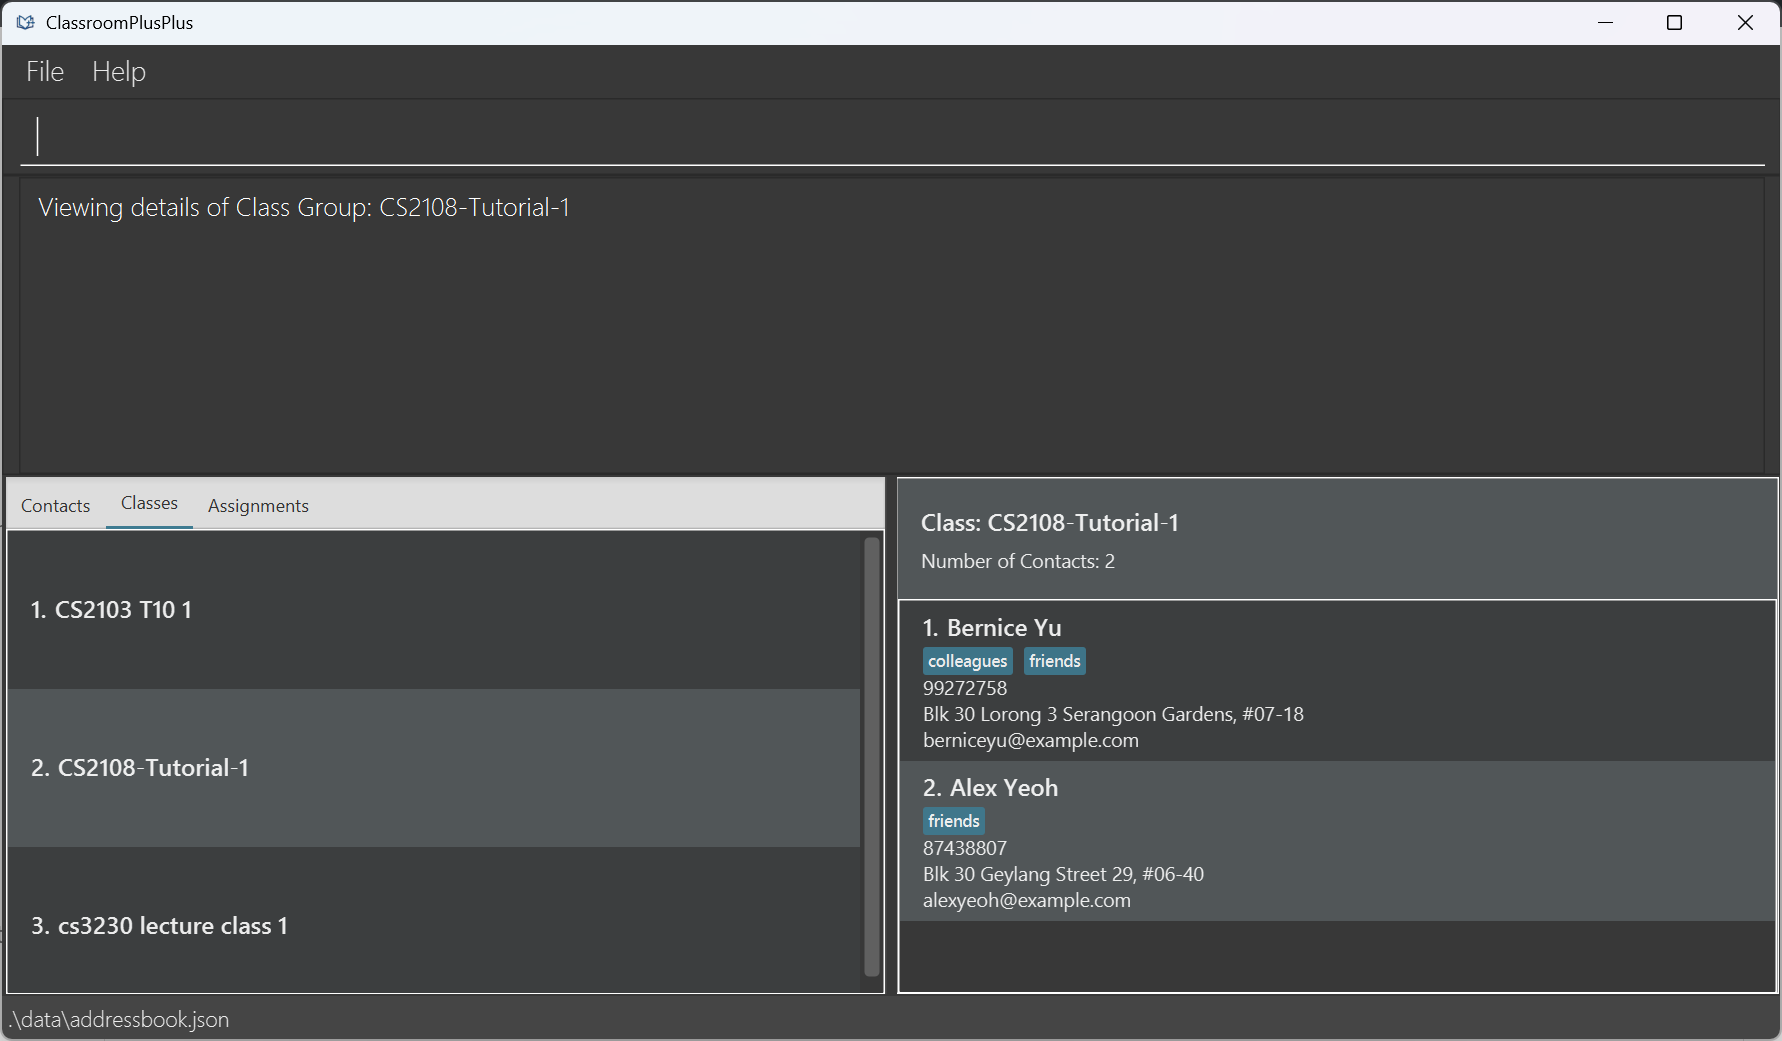
- In the detailed view, you can see the class name, and the list of contacts allocated to it. Any changes made to the class details or contact memberships will be reflected in real-time in the detailed view as well.
View assignment details
Format: view ass/ASSIGNMENT_NAME
Shows the full details of the assignment with the specified
ASSIGNMENT_NAME.ASSIGNMENT_NAMEmust match the name of an existing assignment (space-less and case-insensitive matching).If the specified assignment does not exist, the command will fail and display an error message.
Tips:
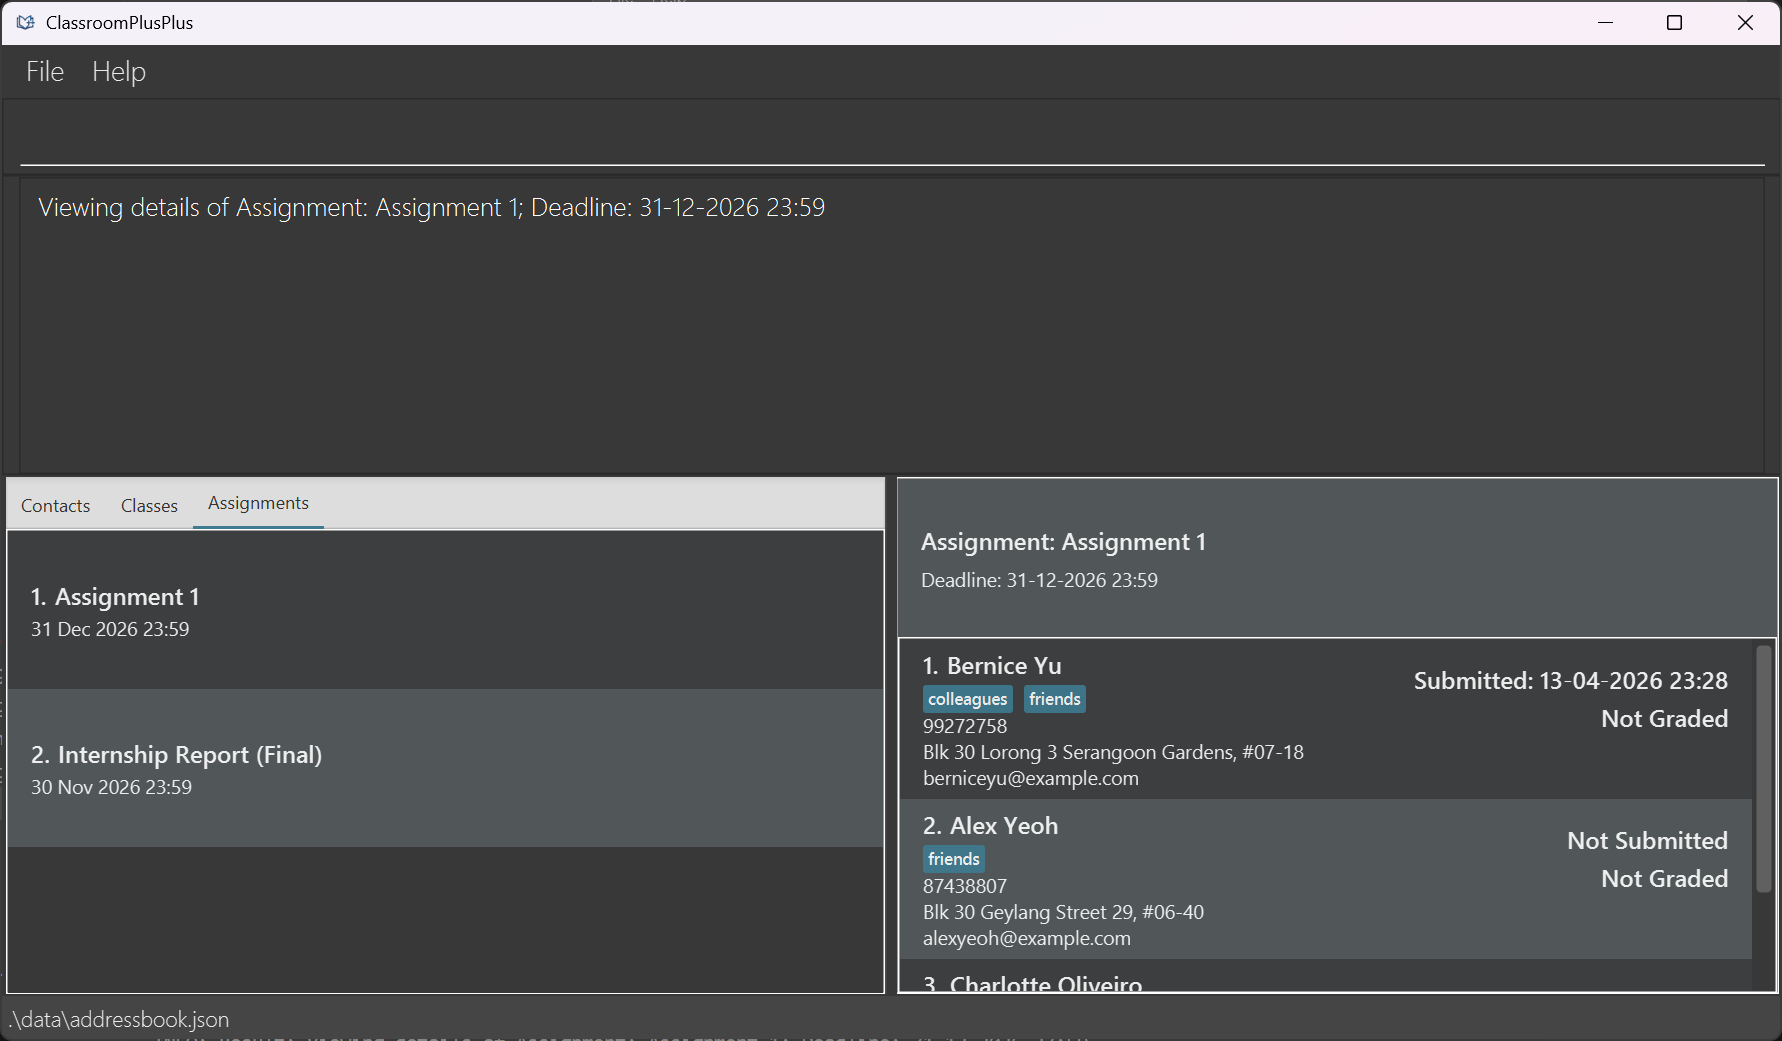
- In the detailed view, you can see the assignment's name, deadline, and the list of contacts allocated to it together with their submission and grading status. Any changes made to the assignment details, submission or grading status, and contact allocations will be reflected in real-time in the detailed view as well.
Editing a contact : editcontact
Edits the details of an existing contact in the address book.
Format: editcontact INDEX [n/CONTACT_NAME] [p/PHONE_NUMBER] [e/EMAIL] [a/ADDRESS] [t/TAGS...]
Edits the contact at the specified
INDEX. The index refers to the index number shown in the displayed contact list.The index must be a positive integer 1, 2, 3, …
At least one optional field must be provided.
Existing values will be overwritten by the input values.
When editing tags, all existing tags are removed and replaced with the new tags provided. To remove all tags, provide
t/with no value.The
CONTACT_NAMEprovided must be valid according to the criteria specified in the feature documentation on Adding a contact.Matching for
CONTACT_NAMEwill be space-less and case-insensitive. For example, "Alex Yeoh" will be treated the same as "alexyeoh".The edited contact must not have a combination of
CONTACT_NAMEandTAGSthat is the same as another existing contact (space-less and case-insensitive matching). For example, if there is already a contact named "Alice Tan" with the tag "friend", you cannot edit another contact to have the name "alice tan" with the tag "Friend".The
PHONE_NUMBERprovided must only contain numeric digits (0-9) and be a minimum of 3 digits long.The
EMAILprovided must be in the formatlocal-part@domain.The
ADDRESSprovided can contain any characters and cannot be blank.
Warnings:
- Editing a contact's details while you are in a filtered list view (e.g. after using
findcontact) may cause confusion as the list may change to match the filters applied previously. After an edit, you should uselist contactsorfindcontactwith an updated filter if you want to see the edited entry.
Tips:
Ensure that you are in the correct tab view by using
list contactsbefore editing to confirm the correct index. You can also usefindcontactto narrow the list first.You may use the command alias
editctinstead ofeditcontactif you prefer a shorter command.
Examples:
list contactsfollowed byeditcontact 1 p/91234567 e/johndoe@example.com
Edits the phone number and email of the 1st contact in the displayed list to "91234567" and "johndoe@example.com" respectively.findcontact n/Betsfollowed byeditcontact 1 n/Betsy Crower t/
Edits the name of the 1st contact in the filtered list to "Betsy Crower" and clears all existing tags.
Editing a class : editclass
Edits the name of an existing class in the address book.
Format: editclass INDEX c/CLASS_NAME
Edits the class at the specified
INDEX. The index refers to the index number shown in the displayed class list.The index must be a positive integer 1, 2, 3, …
The
CLASS_NAMEprovided must be valid according to the criteria specified in the feature documentation on Adding classes.Matching for
CLASS_NAMEwill be space-less and case-insensitive. For example, "CS2103T Tutorial Group 10" will be treated the same as "cs2103ttutorialgroup10".All contacts previously allocated to this class will remain allocated after the edit.
Warnings:
Editing a class name is permanent and will be reflected across all contact allocations. Ensure the new name is correct before confirming the edit.
Editing a class name while you are in a filtered list view (e.g. after using
findclass) may cause confusion as the list may change to match the filters applied previously. After an edit, you should uselist classesorfindclasswith an updated filter if you want to see the edited entry.
Tips:
Ensure that you are in the correct tab view by using
list classesbefore editing to confirm the correct index. You can also usefindclassto narrow the list first.You may use the command alias
editcinstead ofeditclassif you prefer a shorter command.
Examples:
list classesfollowed byeditclass 1 c/CS2103T T10 2
Renames the 1st class in the displayed class list toCS2103T T10 2.findclass c/Tutorial Group Afollowed byeditclass 1 c/Tutorial Group B
Renames the 1st class in the filtered list toTutorial Group B.
Editing an assignment : editass
Edits the details of an existing assignment in the address book.
Format: editass INDEX [ass/ASSIGNMENT_NAME] [d/DEADLINE]
Edits the assignment at the specified
INDEX. The index refers to the index number shown in the displayed assignment list.The index must be a positive integer 1, 2, 3, …
At least one optional field must be provided.
Existing values will be overwritten by the input values.
The
ASSIGNMENT_NAMEprovided must be valid according to the criteria specified in the feature documentation on Adding assignments.Matching for
ASSIGNMENT_NAMEwill be space-less and case-insensitive. For example, "Assignment 1" will be treated the same as "assignment1".The
DEADLINEprovided must be in the formatdd-MM-yyyy HH:mm.Editing an assignment's name or deadline will not affect any existing submission or grading records associated with the assignment
Warnings:
Editing an assignment's name or deadline is permanent and will be reflected across all contact allocations. Ensure the new name is correct before confirming the edit.
Editing an assignment's details while you are in a filtered list view (e.g. after using
findass) may cause confusion as the list may change to match the filters applied previously. After an edit, you should uselist assignmentsorfindasswith an updated filter if you want to see the edited entry.
Tips:
- Ensure that you are in the correct tab view by using
list assignmentsbefore editing to confirm the correct index. You can also usefindassto narrow the list first.
Examples:
list assignmentsfollowed byeditass 1 ass/Assignment 1234 d/20-12-2026 23:59
Edits the name and deadline of the 1st assignment in the displayed assignment list to "Assignment 1234" and 20 December 2026 11.59pm respectively.findass ass/Assignment 1followed byeditass 1 d/01-01-2027 00:00
Edits only the deadline of the 1st assignment in the filtered list to 1 January 2027 12am.
Deleting contacts, assignments, or classes : delete
Deletes the specified contact(s), assignment, or class from the address book.
Delete contacts
Format: delete ct/CONTACT_INDICES...
Deletes the contact(s) at the specified
CONTACT_INDICES.The index refers to the index number shown in the displayed contact list.
The index must be a positive integer 1, 2, 3, …
At least one index must be provided.
Warnings:
Deletion is permanent and cannot be undone.
Deleted contacts are removed from all classes and assignments they were allocated to.
All grading records for assignments allocated to the contact are also removed.
Tips:
- Use
findcontactbefore deleting to narrow the list and make sure you have the right index. You can also delete multiple contacts at once:delete ct/1 3 5.
Examples:
list contactsfollowed bydelete ct/2deletes the 2nd contact in the displayed list.findcontact n/Betsyfollowed bydelete ct/1deletes the 1st contact in the filtered results.delete ct/1 3deletes the 1st and 3rd contacts shown in the displayed list.
Delete class
Format: delete c/CLASS_NAME
Deletes the class with the given
CLASS_NAME.The name is matched case-insensitively and ignores spaces.
Deleting a class removes the grouping only and removes all contact allocations to the class. The contacts that were in the class are not deleted from the address book.
Warnings:
Deleting a class is permanent. You will need to recreate the class and re-add contacts if you delete it by mistake.
Deleting a class does not unallocate any assignments that are allocated to contacts belonging to the class.
Tips:
- If you just want to remove a single student from a class, use
unallocclassinstead of deleting the entire class.
Examples:
delete c/CS2103T T14deletes the class namedCS2103T T14.delete c/Tutorial Group Adeletes the class namedTutorial Group A.
Delete assignment
Format: delete ass/ASSIGNMENT_NAME
Deletes the assignment with the given
ASSIGNMENT_NAME.The name is matched case-insensitively and ignores spaces.
All assignment allocations are removed and their grading records are discarded.
Warnings:
- Deleting an assignment removes it and all its grading records permanently. This cannot be undone.
Tips:
- Use
list assignmentsto see all assignment names before deleting, so you can copy the exact name.
Examples:
delete ass/Assignment 1deletes the assignment namedAssignment 1.delete ass/Midterm Examdeletes the assignment namedMidterm Exam.
Clearing all entries : clear
Clears all entries from the address book.
Format: clear
Exiting the program : exit
Exits the program.
Format: exit
Saving the data
CPP data is saved in the hard disk automatically after the execution of any valid command. There is no need to save manually.
Editing the data file
CPP data is saved automatically in [JAR file location]/data/addressbook.json. Advanced users are welcome to update data directly by editing that data file.
Warnings:
You should only make edits to
addressbook.jsonwhen the application is closed. Any edits made while the application is running will not be saved.If your changes to the data file make its format invalid, CPP will discard all data and start with an empty data file at the next run. Hence, it is recommended to take a backup of the file before editing it.
Certain edits can cause CPP to behave in unexpected ways (e.g., if a value entered is outside the acceptable range). Therefore, edit the data file only if you are confident that you can update it correctly.
Editing the preferences file
CPP preferences are saved in [JAR file location]/preferences.json. This should only be used to modify the timezone setting, which is used to determine the deadlines and submission/grading dates shown in the app.
By default, this is set to GMT +8, but you can change it to your local timezone if needed. Acceptable values range from -18 to 18, and any invalid or missing timezone values will default to GMT +8.
You should only make edits to preferences.json when the application is closed. Any edits made while the application is running will not be saved.
Planned features and future work
Filtering contacts by submission and grading status for a particular assignment
CPP does not currently support filtering contacts by submission and grading status for a particular assignment, but this is a planned feature for future releases, to allow users to easily track the progress of their students for each assignment. For example, users may want to filter the list of contacts to show only those who have submitted the assignment but have not been graded yet.
We will consider implementing this by adding filter options to the existing view command, allowing users to specify the assignment name and the desired submission/grading status.
In the meantime, users will only have the default view command which shows all contacts allocated to an assignment without filtering by submission or grading status.
Sorting contacts by score for a particular assignment
CPP does not currently support sorting contacts by score for a particular assignment, but this is a planned feature for future releases, to allow users to easily identify top performers and those who may need additional help. For example, users may want to sort the list of contacts allocated to an assignment by their scores in descending order.
We will consider implementing this by adding sort options to the existing view command, allowing users to specify the assignment name and the desired sorting order (e.g., ascending or descending).
In the meantime, users will only have the default view command which shows all contacts allocated to an assignment without sorting by score.
Archiving contacts, classes, and assignments
CPP does not currently support archiving contacts, classes, and assignments, but this is a planned feature for future releases, to allow users to keep their address book organized without permanently deleting data. For example, users may want to archive a class that has ended, while still keeping the data for record-keeping purposes.
We will consider implementing this by adding an archive command that allows users to specify the contact, class, or assignment to be archived. Archived items will be hidden from the default lists but can be accessed through a separate view or by using specific filter options.
In the meantime, users can save a backup of their data file before deleting any contacts, classes, or assignments that they wish to archive, and restore the data if needed.
Taking attendance for classes
CPP does not currently support taking attendance for classes, but this is a planned feature for future releases, to allow users to easily track attendance records for their classes. For example, users may want to mark which students attended a particular class session.
We will consider implementing this by adding attend and absent commands that allows users to specify the class name, date, and the list of contacts who attended. Attendance records for the class can then be viewed using the existing view command.
In the meantime, users can create an attendance assignment allocated to the class for each session, and manually mark attendance by marking the assignment as submitted for students who attended, and not marking it for those who were absent.
Exporting data as a CSV file
CPP does not currently support exporting data as a CSV file, but this is a planned feature for future releases, to allow users to easily retrieve the data they require. For example, users may want to export the list of scores for a particular assignment in order to perform further analysis or share it with others.
We will consider adding an export command that allows users to specify the filename, and the entire addressbook.json will be converted to a CSV file with readable column headers and values.
In the meantime, users can manually extract the required data from addressbook.json and convert it to CSV format using external tools if needed.
FAQ
Q: How do I transfer my data to another computer?
A: Install CPP on the other computer by following the installation instructions in Install and run, then copy the data/addressbook.json file from your existing app home folder into the new app home folder by overwriting the empty file created on first run. Always stop the app before copying files.
Q: How can I back up my data and restore it if something goes wrong?
A: Make a copy of data/addressbook.json and store it in a safe location such as a cloud or external drive. To restore, stop CPP, replace the addressbook.json in the app home data/ folder, then start CPP.
Q: How does CPP prevent duplicate entries?
A: CPP performs basic duplicate detection at entry. The app prevents duplicate names within assignments or within classes itself. While an assignment and a class can share the same name, you cannot have two assignments or two classes share the same name. For contacts, CPP prevents duplicate combinations of name and tags, but allows multiple contacts to share the same name as long as their tags differ.
Q: Can I export/import data for other systems (e.g., Excel)?
A: The primary data format used by CPP is JavaScript Object Notation (JSON). We do not support importing from Excel, but users may manually convert their Excel files to JSON format, adhering to the structure and format of the addressbook.json file generated on first run. Manual editing of addressbook.json is not recommended unless you are comfortable with the JSON format.
Known issues and workarounds
Multiple screens / off-screen window: If you move the app to a secondary monitor and later use only the primary monitor, the GUI may open off-screen.
Workaround: deletepreferences.jsonin the app home folder while the app is closed; the window position will reset on next start.Minimized Help Window: If the Help Window is minimized and you run
helpagain, the existing window may remain minimized.
Workaround: restore it manually from the taskbar.Preferences or data corruption: If
preferences.jsonoraddressbook.jsonbecomes invalid (e.g., partial writes), CPP will start with an empty dataset.
Workaround: Always keep backups before making changes.File permission issues (Windows): If you run the app from a protected folder without sufficient permissions, it may crash on startup due to the inability to read/write necessary files.
Workaround: Run from a user-writable folder (e.g., Documents).File overwrite issues with multiple instances: Running multiple instances of CPP simultaneously can cause conflicts in writing to
addressbook.jsonandpreferences.json, leading to potential data loss.
Workaround: Avoid running multiple instances at the same time. Always ensure one instance is closed before starting another.
If you encounter other issues, please open a GitHub Issue in the project repository and include data/addressbook.json and preferences.json in your report for troubleshooting.
Command summary
| Action | Format, Examples | Command Aliases |
|---|---|---|
| Help | help | None |
| Add Contact | addcontact n/CONTACT_NAME p/PHONE_NUMBER e/EMAIL a/ADDRESS [c/CLASS_NAME] [ass/ASSIGNMENT_NAME] [t/TAGS...] e.g., addcontact n/John s/o Doe p/98765432 e/johnd@example.com a/311, Clementi Ave 2, #02-25 c/CS2103T T10 1 ass/Assignment 1 t/friends owesMoney | addct |
| Add Class | addclass c/CLASS_NAME [ct/CONTACT_INDICES...] e.g., addclass c/CS2103T T10 1 ct/1 2 3 | addc |
| Allocate Class | allocclass c/CLASS_NAME ct/CONTACT_INDICES... e.g., allocclass c/CS2103T T10 1 ct/1 2 3 | allocc |
| Unallocate Class | unallocclass c/CLASS_NAME ct/CONTACT_INDICES... e.g., unallocclass c/CS2103T T10 1 ct/1 2 3 | unallocc |
| Add Assignment | addass ass/ASSIGNMENT_NAME d/DEADLINE [c/CLASS_NAME] [ct/CONTACT_INDICES...] e.g., addass ass/Assignment 4 d/15-01-2024 23:59 c/CS2103T T10 1 ct/4 5 | None |
| Allocate Assignment | allocass ass/ASSIGNMENT_NAME [c/CLASS_NAME] [ct/CONTACT_INDICES...] e.g., allocass ass/Assignment 3 c/CS2103T T10 1 ct/1 2 3 | None |
| Unallocate Assignment | unallocass ass/ASSIGNMENT_NAME [c/CLASS_NAME] [ct/CONTACT_INDICES...] e.g., unallocass ass/Assignment 3 c/CS2103T T10 1 ct/1 2 3 | None |
| Submit Assignment | submit ass/ASSIGNMENT_NAME [c/CLASS_NAME] [ct/CONTACT_INDICES...] [d/SUBMISSION_DATE] e.g., submit ass/Assignment 3 c/CS2103T T10 1 ct/1 2 3 d/21-02-2026 23:50 | None |
| Unsubmit Assignment | unsubmit ass/ASSIGNMENT_NAME [c/CLASS_NAME] [ct/CONTACT_INDICES...] e.g., unsubmit ass/Assignment 3 c/CS2103T T10 1 ct/1 2 3 | None |
| Grade Assignment | grade ass/ASSIGNMENT_NAME s/SCORE [c/CLASS_NAME] [ct/CONTACT_INDICES...] [d/GRADING_DATE] e.g., grade ass/Assignment 3 c/CS2103T T10 1 ct/1 2 3 s/67.9 d/21-02-2026 23:50 | None |
| Ungrade Assignment | ungrade ass/ASSIGNMENT_NAME [c/CLASS_NAME] [ct/CONTACT_INDICES...] e.g., ungrade ass/Assignment 3 c/CS2103T T10 1 ct/1 2 3 | None |
| List Contacts | list contacts | list ct |
| List Classes | list classes | list c |
| List Assignments | list assignments | list ass |
| Find Contact | findcontact n/CONTACT_NAME_SEARCH_STRING e.g., findcontact n/alice sfindcontact p/PHONE_NUMBER_SEARCH_STRING e.g., findcontact p/91234567findcontact e/EMAIL_SEARCH_STRING e.g., findcontact e/gmail.com | findct |
| Find Class | findclass c/CLASS_NAME_SEARCH_STRING e.g., findclass c/CS2103T | findc |
| Find Assignment | findass ass/ASSIGNMENT_NAME_SEARCH_STRING e.g., findass ass/Assignment 1findass [ds/DEADLINE_START] [de/DEADLINE_END] e.g., findass ds/31-12-2024 or findass ds/31-12-2024 23:59 de/02-01-2025 23:59 | None |
| View Details | view ct/CONTACT_INDEX e.g., view ct/2view c/CLASS_NAME e.g., view c/CS2103T T10 1view ass/ASSIGNMENT_NAME e.g., view ass/Assignment 1 | None |
| Edit Contact | editcontact INDEX [n/CONTACT_NAME] [p/PHONE_NUMBER] [e/EMAIL] [a/ADDRESS] [t/TAGS...] e.g., editcontact 2 n/James Lee e/jameslee@example.com | editct |
| Edit Class | editclass INDEX c/CLASS_NAME e.g., editclass 1 c/CS2103T T10 2 | editc |
| Edit Assignment | editass INDEX [ass/ASSIGNMENT_NAME] [d/DEADLINE] e.g., editass 1 ass/Assignment 2 d/20-12-2026 23:59 | None |
| Delete | delete ct/CONTACT_INDICES... e.g., delete ct/3delete ass/ASSIGNMENT_NAME e.g., delete ass/Assignment 1delete c/CLASS_NAME e.g., delete c/CS2103T T10 1 T14 | None |
| Clear | clear | None |
| Exit | exit | None |